
Fix “This PC Can’t Run Windows 11” Error Or “This PC Doesn’t Meet Windows 11 System Requirements” 😥 :
The first primary build of Windows 11 has been leaked. This is fresh out of the brand-new state of Windows. The kit has been spoiled because someone released(leaked) it early. We trust it is unfortunate for them.
Now, Microsoft has officially declared this. However, They also have published the Windows 11 ISO file.
They give us a way to install the brand new Windows 11 if your PC matches the Windows 11 system requirements criteria. We explained everything in this article, how you can install it on your PC.

The current setup of my system has the latest version of Windows 10 installed. I need to install Windows 11 on it. I don’t figure anybody would install Windows 11 on a PC with a particularly old configuration like me.
I just ran the Windows 11 Pc Health Check Apps. It’s showing me the error. It clearly says, 😥 “This PC doesn’t meet Windows 11 system requirements” 😥. Many people may have experienced this problem while installing.
See the Picture. These are updated versions of the errors. You can see four types of (this PC doesn’t meet Windows 11 system requirements) errors here.
- TPM 2.0. It means that your system does not meet the TPM requirement.
- Hard-disk error. You know we can manage to get a better hard disk.
- Processor error. This is something that isn’t going to satisfy most people.
- Secure boot. You know these are the most common ones. But the most important thing. You will need your PC to run Windows 11 is TPM 2.0.
But I have found many solutions on how to install Windows 11 without TPM & secure boot. I will share it with all of you.
So now, if the application tells you that your computer is not compatible, then keep reading because there is more to the requirements. For example, if you visit the official Windows 11 page. You can see that the minimum system requirements have changed compared to Windows 10.
Why does it show the “This PC can’t run Windows 11” error?
The main reason for this error is Security. Microsoft changed the security level from Windows 10 to Windows 11. The security maintains my TPM. TPM(Trusted Platform Module) is a global standard for a secure cryptoprocessor.
This error will show if this option is disabled in your bios setting. You need to enable this option. People have different types of motherboards, and the TPM option is located in different places.
What is a TPM?
It’s a secure cryptoprocessor. It generates stores and limits the use of cryptographic keys. TPM includes multiple physical security mechanisms to make them tamper-resistant. They’ve typically been chips soldered onto a computer or server motherboard.
But with TPM version 2.0:
It allowed all kinds of new ways of implementing TPM. We could implement it into a chipset. We could put it into a system on a chip.
A TPM chip is a built-in security feature that goes beyond regular security software. It is designed to enhance protection and can also help keep your Dell computer running well. Quite a few systems have TPM technology installed on their motherboard. Latitudes, E-series, Optiplex, Precision Mobiles, XPS & AW, Vistro & Venue.
TPM 2.0 requires the BIOS to be set to UEFI and not to Legacy, and Windows must be 64-bit.
What is Secure Boot?
Why does Windows 11 need this extra security? Quickly secure boot is part of UEFI, the newer interface between your bios and your OS. Secure boot resists infection from malware, including boot loaders
Windows 11 System Requirements
Windows 11 Supported Processors
It requires a 64-bit processor with at least two cores. However, not every processor will be supported. Windows 11 will only support some of the Intel, AMD, and Qualcomm processors.
The company has already published the processors that will be officially supported on Windows 11. You can check yourself.
But if you go to the Intel list, you can see that Windows 11 will only support some of the atom processors, Celeron processors, and the Intel core processor, starting with the 8th generation above.
Scroll down a little bit and go through all the lists. You can see Windows 11 will support the Xeon and some of the Pentium processors.
As part of the AMD processors list, you can see that Windows 11 will support some AMD outland processors, including Epic and Ryzen CPUs. Starting with the third generation and newer. And some of the second generations as well.
For Qualcomm processors, windows 11 will support the snapdragon 850 and the Microsoft sq1 and sq2 processors that the company is using for its surface devices, although Windows 11 now has specific processors.
Windows 11 Memory Requirements
The memory requirement has been bumped from previous versions from 2 gigabytes to 4 gigabytes. The storage minimum requirement is now 64 instead of 32 gigabytes, as we’ve seen for Windows 10.
You can check the device specifications to know if you meet the minimum requirements by opening the Settings app.
Then go to System, look down at the left-sidebar, and click on “About.”
Now, on the Device specifications, you can see the install memory and the assistant type for Windows 11. It would be best if you have a 64-bit processor. If you have 32, you won’t be able to install the Operating System.
Most Common Error While Installing Windows 11 On Unsupported PC
First, you need to know about an error that you may face while installing Windows. Now, these are the errors you may have encountered while installing Windows 11 on an Unsupported PC. The errors could be any of these:t

- TPM 2.0 must be supported and enabled on this PC (this means that you need to Enable the TPM security feature in your bios)
- The PC must support Secure Boot
- The processor isn’t currently supported for Windows 11
- The system disk needs to be 64 GB or Larger
Error 1, TPM 2.0 Must Be Supported And Enabled On This PC
One of the most common problems that many people face while installing Windows 11 and the problem says that the pc must support TPM 2.0.
This means that you have not enabled the TPM security feature in your bios because Microsoft set a condition that the PC needs in-built TPM 2.0 chip support in order to install Windows 11.
How To Check TPM 2.0 Is Enabled or Disabled?
Press Windows Key + R > Type tpm.msc in run box > Press Enter. Now Check the status.
If you get the message, “Compatible TPM cannot be found,” it means TPM is either not present or is not enabled in BIOS.
Error 2, The PC Must support Secure Boot (This PC Can’t Run Windows 11)
Now, there’s one more reason that the “your pc doesn’t meet the hardware requirements for windows 11” pop-up might come. It is because either the secure boot mode is not enabled in your bios or it’s not in-built into your PC. Most probably, it’s not enabled in your bios. Because most of the recent PCs have secure boot. But a pretty old PC might not have this.
Solution
Method 1 (Recommended): If your PC is too old and your PC doesn’t have a TPM 2.0 chip. Then you need to try the below methods only once (Install Windows 11 Without TPM 2.0 & Secure Boot).
Method 2: If your system has TPM 2.0 and Secure Boot support. Check the tip on how to enable TPM 2.0 and Secure Boot from bios.
Method 1, Upgrade To Windows 11 Without TPM
Also, You can Upgrade Windows 10 To Windows 11 Without TPM Checking (On Unsupported Hardware). I will highly recommend this option. This is the easiest way to upgrade Windows 10 to Windows 11.
Method 2, Install Windows 11 Without TPM 2.0 and secure Boot
Now that Microsoft has released Windows 11 ISO. So, I decided to do a fresh install on all of my home PCs. Let’s go. It’s simple, isn’t it? Easy, peasy?
What! 😭 my PC Doesn’t meet the requirement. 😭 What do you mean? This Must be a TPM thing. Let me go into the BIOS. Where is the TPM TPM TPM? This must be in here. I can’t find TPM in My BIOS.
If your story is the same, Do not worry. We’ve got you covered. We will get you to install Windows 11 Without TPM Checking or On Unsupported Hardware.
Step 1, head and click on the link. There is a MediaCreationTool.bat. This is a simple and powerful Windows 11 deployment automation tool. This tool helps you to bypass your TPM check while installing Windows 11.
Step 2, So let’s download the zip file. Navigate to the download folder > Extract the zip > Open the folder.
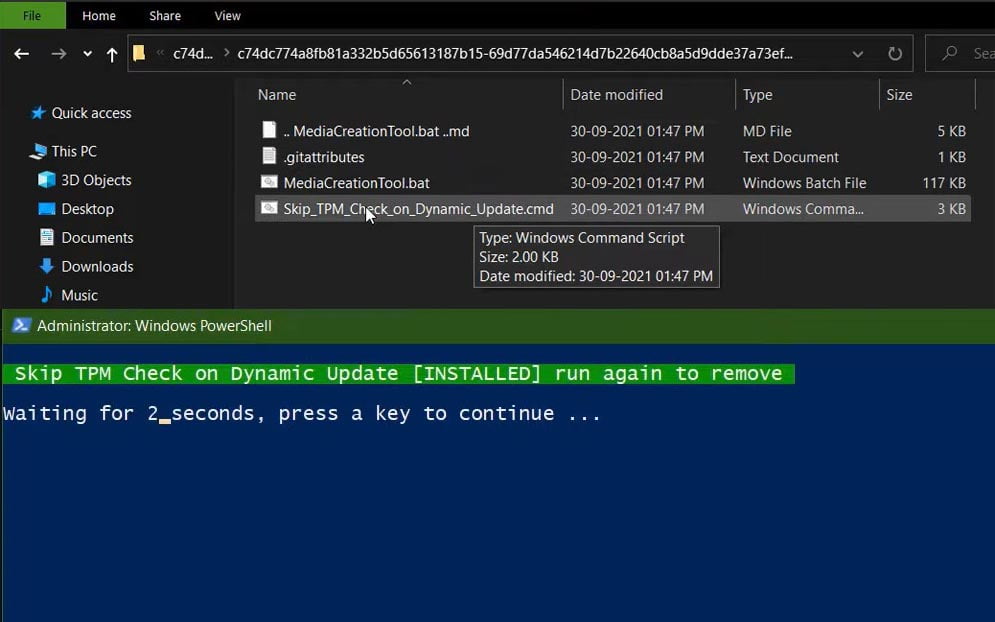
Step 3, Here you can see a file named: “Skip_TPM_Check_on_Dynamic_Update” > Right-click on it and Choose “Run as Administrator.”
Step 4, Now, It will open up a command prompt. It will ask you to “Press any key to continue…” > Press any key. It will close automatically.
Now, You are ready to run the Official Windows 11 ISO.exe file.
Step 5, Go to the Microsoft official site (Click here) > Scroll down to the bottom. Download the Windows 11 ISO file.
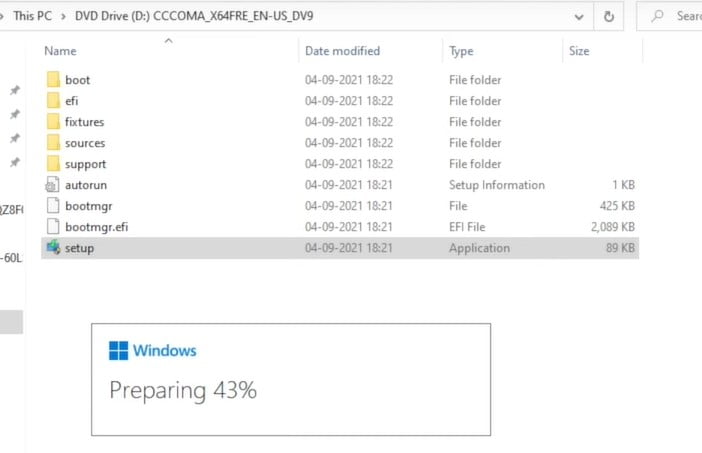
Step 6, Go to the download folder > simply double-click on ISO file > Again double click on Setup.exe file. It will start installing.
This time, you don’t have to deal with the TPM Incompatibility. Now, it’s bypassed, so that you can install Windows 11 without TPM checking. It will prompt you that your PC is still not compatible with Windows 11 but is trying to install it. That means there might be some issues.

Step 7, Don’t worry!! Now, you need to Accept this and 👍 Boom!!!. And there it is. You’re ready to install your Windows 11 pro. Let’s install this. Please follow the following upgrade process, and it’s as straightforward as installing software.
If you want to try an alternate method to bypass your TPM, Check the 2nd method.
Method 3, How To Enable TPM 2.0 & Secure Boot In BIOS
I couldn’t install it on my older PCs, So I tried two different systems, which gave me an error. You know, my computer doesn’t meet the minimum requirement. Now, I did a different install style, and it gave me an error message that told me what was wrong.
1. Please Go to Windows 11 official page > Sign Up or Not, Or visit this site link WindowsPCHEALTHcheck. Download the app and install it on your system. Next, open the app and click on the “check now” button.
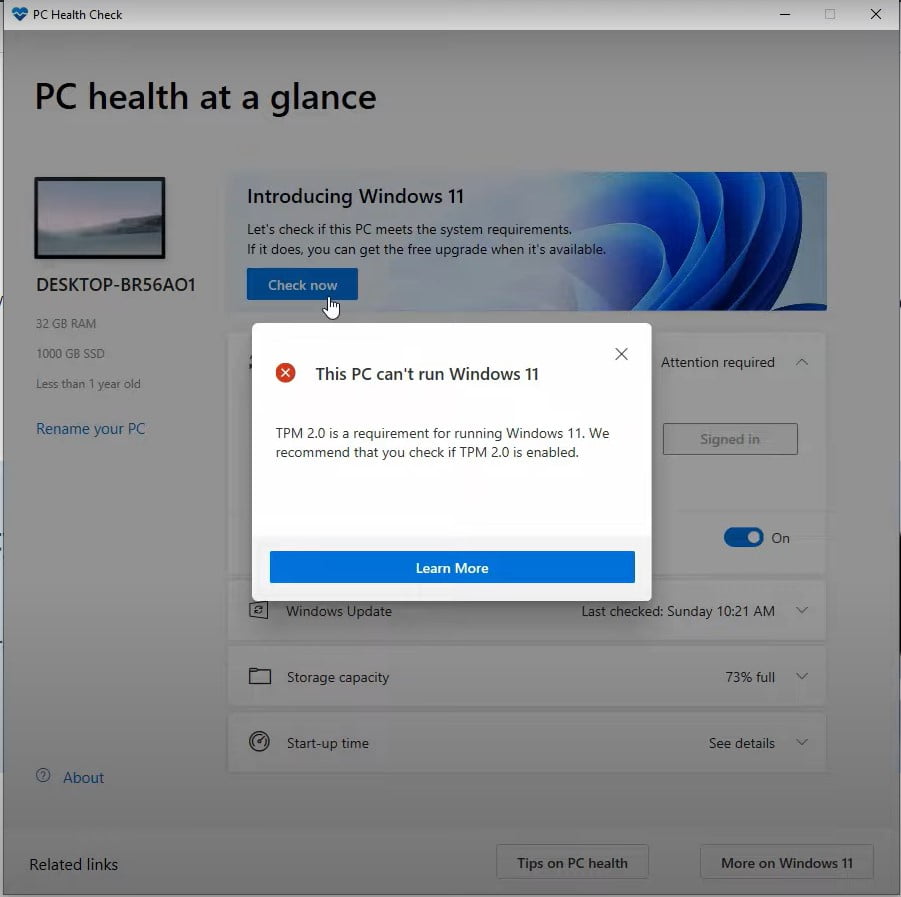
2. If this app shows you the message “This PC can’t run windows 11.” It also gives you the information that is missing. If the error is “TPM 2.0 is a requirement for running windows 11”. I think Your computer is not compatible because it requires TPM 2.0 and Secure boot Options Enabled.
If it’s not already enabled, You need to enable TPM and Secure boot UEFI mode. Please visit the link and follow the guide we explained there.
If you are only unwilling to make changes in BIOS settings, or on the off chance that you have an old PC that doesn’t have options for ”Secure boot” or ”TPM 2.0′‘ in the BIOS settings, then, at that point, there’s a basic workaround for you.
You can avoid enabling ‘Secure boot’ or ‘TPM 2.0’ on your PC, sidestep the Windows 11 system security requirements, and proceed with the installation without any issue using the below methods.
HOT TOPIC: Speed Up Windows 11 | Optimization For Gaming and Development
Read More: How to Rollback Windows 11 To Windows 10 [Downgrade Windows 11]
TRENDING: How To Install Windows 11 Official | Released Windows 11 ISO Download
Method 4, How to Clean Install Windows 11 Without TPM 2.0 & Secure Boot
1. Click on the search box and type task manager > open Task Manager.
2. Click on File > Run New task > Next, click on the Browse button.
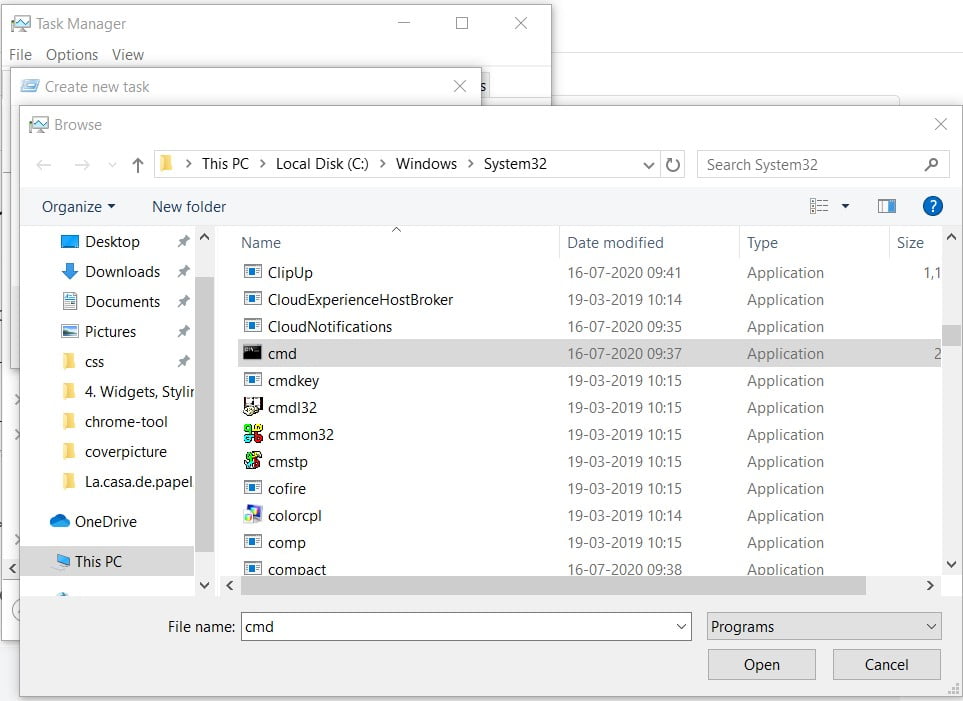
3, Go to “C” drive, and you need to open this path:
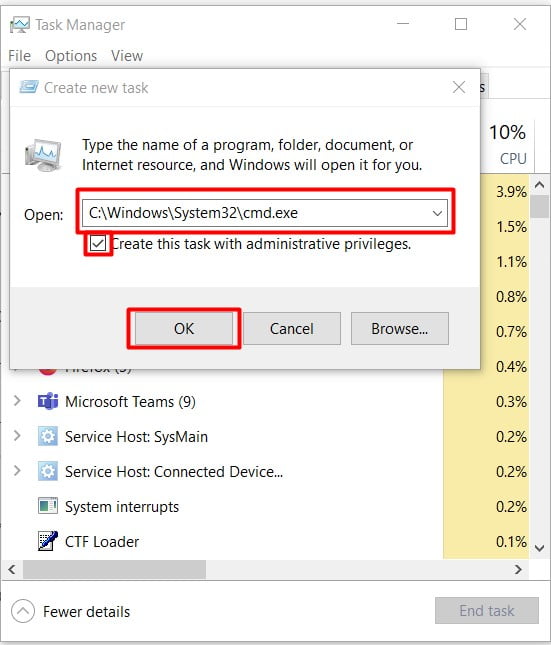
This PC > C drive > Windows > system32> select cmd.
4. Click on this checkbox and then click on OK.
5. Run the following command:
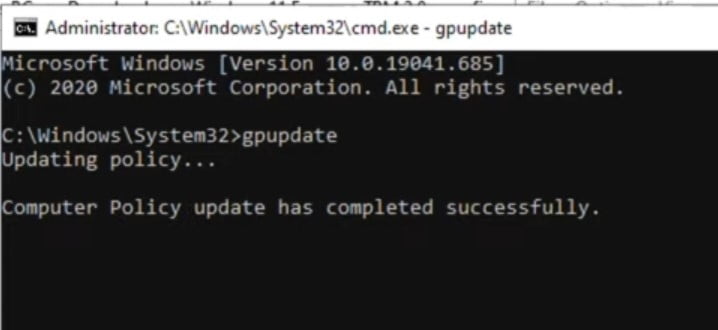
gpupdateSo, if you’re getting that issue where it says “ This PC Can’t Run Windows 11” because it does not meet the minimum requirement. Then, I will show you exactly how to solve this issue over here.
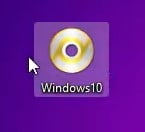
Step 1, Create A New Folder
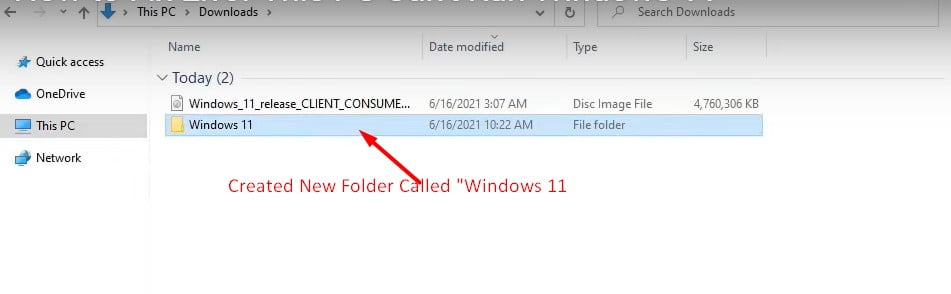
1. First thing, You need to create a new folder. I created a folder called “Windows 11”. (See the picture).
Step 2, Copy And Paste iSO Files To the New Folder
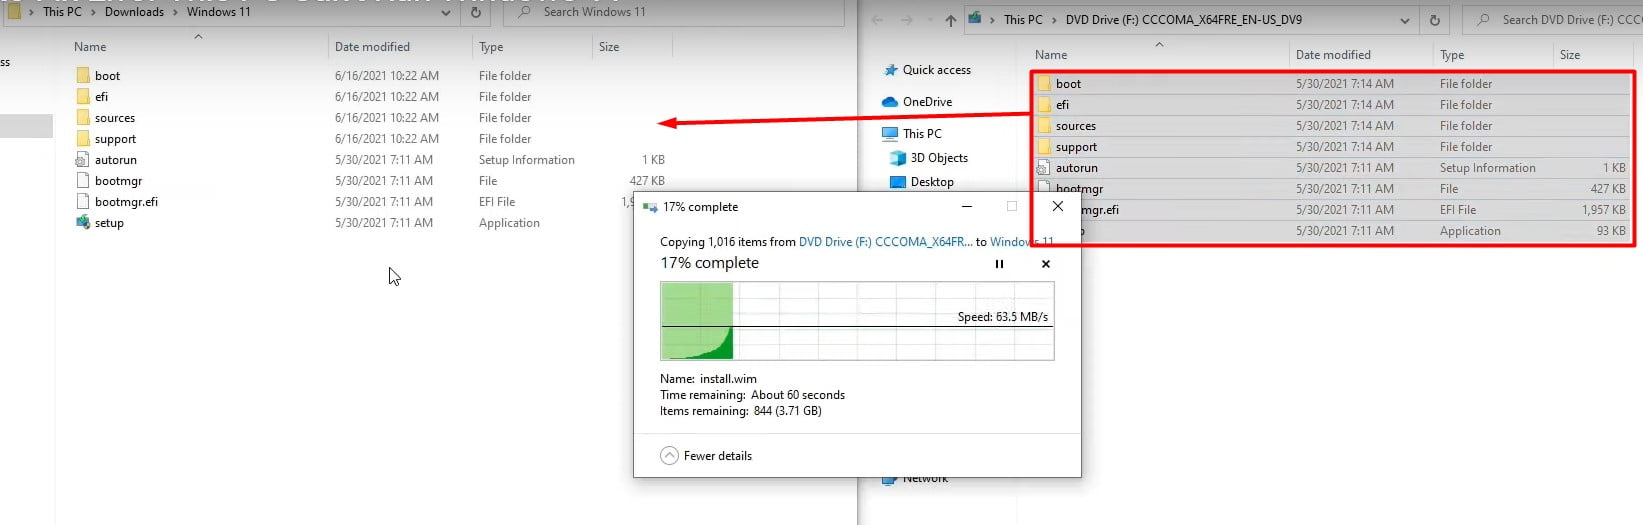
2. Download the Windows 11 iSO image file. Right-click on it. Select the “Mount” option from the contextual menu. It will extract all the files.
3. Next, Copy the Windows 11 ISO files. And Paste it into the new Windows 11 Folder (The folder we created first ). This is really important because we need to modify one file in the source folder to get it working properly.
Step 3, Find The “appriserres.dll” File
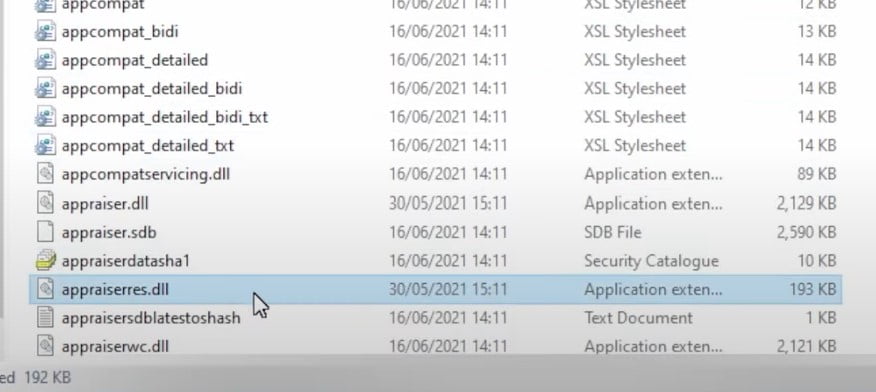
4. Once all files have been successfully copied. You need to do a very simple thing. You just need to open the folder called “Sources.”Once you are in this folder, you need to find the file called “appriserres.dll”.
Step 4, Replace The “.Dll” FIle
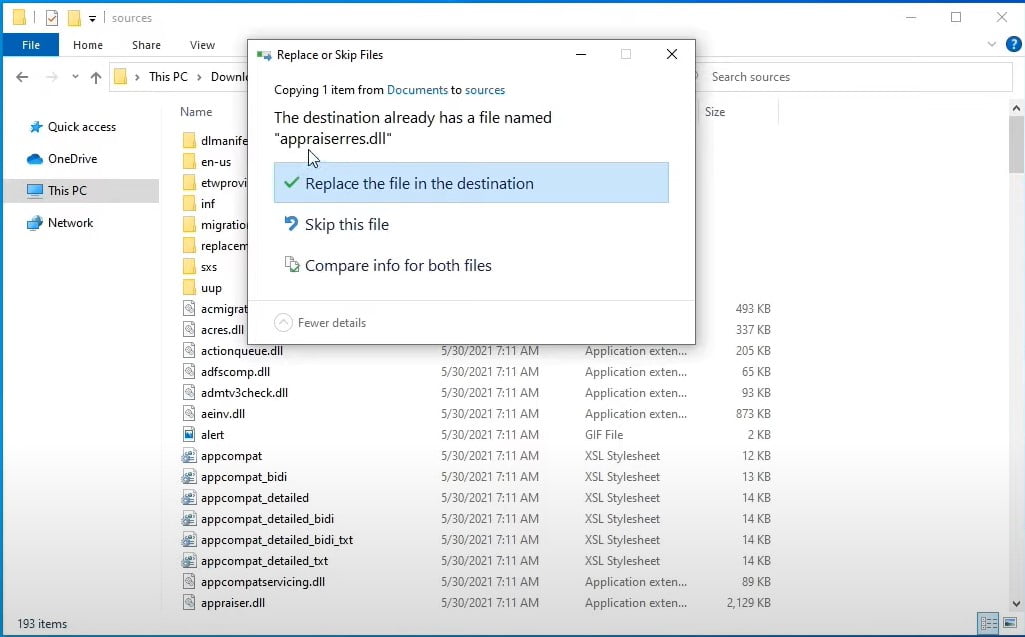
5. You need to replace this “appriserres.dll” file with a new file. (CLICK HERE AND DOWNLOAD THE NEW appraiserres.dll FILE). Once the download is completed. Go to the Download location > Copy the new file > Paste and Replace the file into the Sources folder.
Step 5, Now RUN The “Setup.exe” File
6. Now, Go to the main folder (Windows 11 Folder) double-click, and run the “Setup.exe” file. Now, I hope it does not show any error (LIKE: “This PC Can’t Run Windows 11) message. Now check the Windows 11 Installation and Setup guide.
Method 5, Install Windows 11 On Unsupported Hardware (Fix This PC Can’t Run Windows 11)
Just make sure you have the following things on hand:
- A USB drive, which has a Windows 11 ISO image loaded into it, burnt into it. Now, You will need just to put it into your system (It does not boot until you finish this process).
- Next thing, you will need a Windows 10 image ISO file download on your desktop. You can see (see the above picture) my desktop screen.
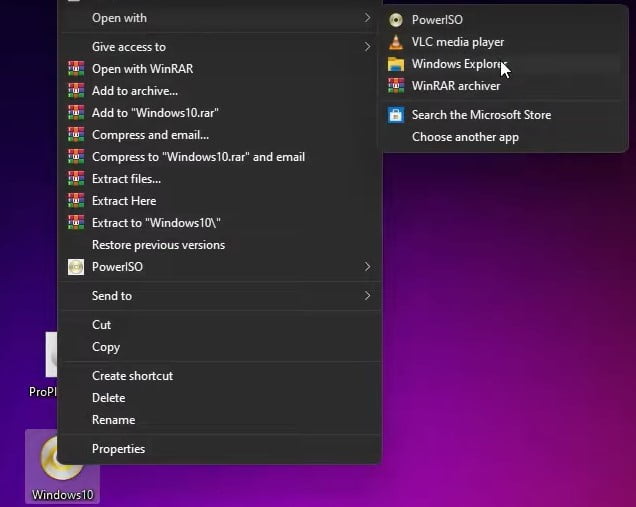
1. So first, you need to right-click on the Windows10 ISO file (Download Windows Creation Media), choose the “Open with” option, and then select “Windows Explorer.” It will show you all the files in the ISO file.
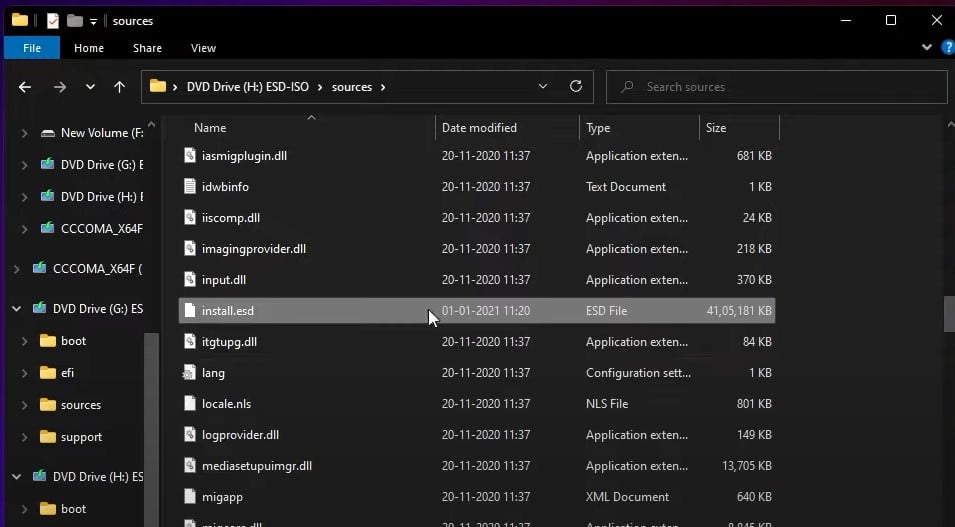
2. Next, You need to go to the “Source” folder. Then press ‘i’ on your keyboard or search for the install.esd or install.wim file.
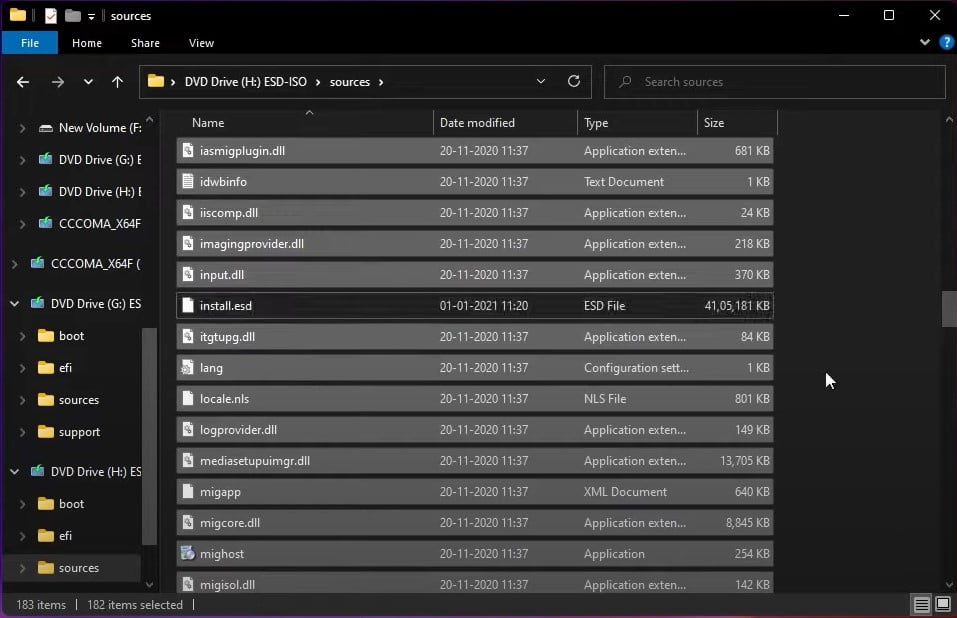
3. Most important: At that point, You need to select all the files by pressing CTRL+A, Except install.esd or install.wim file. Remember, don’t select the filename I mentioned here (See the picture).
4. Now, Copy all the selected files by pressing CTRL + C. (Also, You can right-click and select the Copy option).
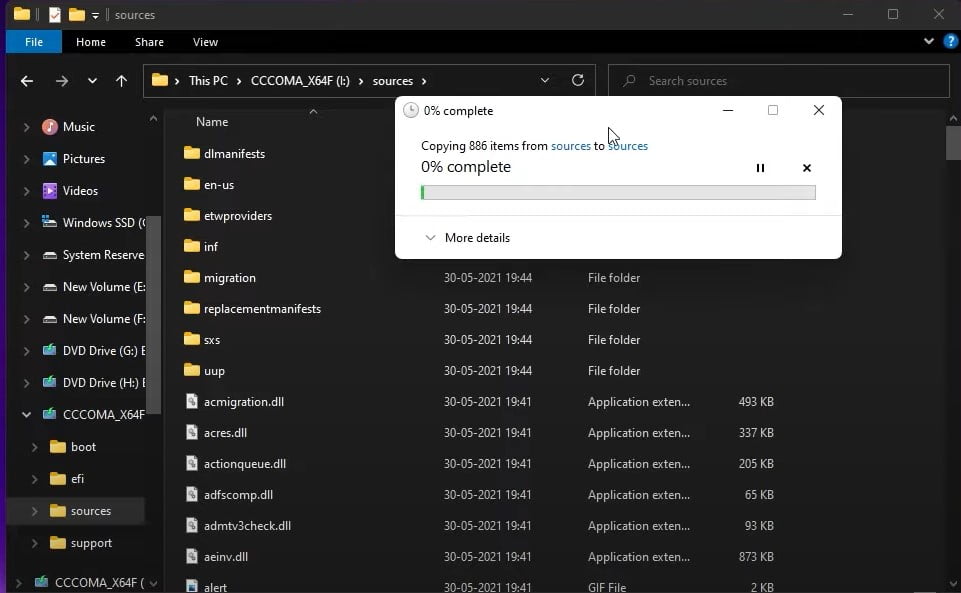
5. Next, You have to go to “This PC” and Open the bootable USB drive that you inserted a few minutes ago. Open the “Source” folder and paste all the files that you have copied. , when you paste it. It will give you a prompt to replace the file with the destination. Just say YES.
6. And then, you need to Restart your system and continue the booting process with this new Windows 11 ISO file. Using this method, you are able to solve the (This PC Can’t Run Windows 11) issue.
People Also Ask
Can I Download Windows 11 for free?
It’s everything associated with Windows 10. Obviously, Windows 10 people can upgrade their OS from Windows 10 to Windows 11 on the system without any cost. YES, Windows 11 is completely free. The upgrade process is the same as before when Microsoft gave users an upgraded from Windows 8.1 to Windows 10 free of charge to boost acquisition.
Is it safe to install Windows 11?
You likely shouldn’t install the spilled Windows 11 Update. Writers and software engineers, journalists, and developers can presumably pull off attempting Windows 11. Now, Microsoft has released Windows 11 officially. Yes, it is safe. However, you need to keep updating the Windows 11 OS frequently.
Read More:
How To Fix Spotify Can’t Play This Right Now Error
KMODE EXCEPTION NOT HANDLED Windows 10 / 8.1 / 8 | How to Fix?
How to Fix Bad Pool Caller BSOD In Windows 10