")
Install Google Play Stor On Windows 11 With Root [Windows Subsystem For Android]: I’ll show you how you can go ahead and install the Google Play Store on Windows 11 and Google Play Services on the Windows subsystem for Android. Some applications, including Snapchat, don’t work until the Google Play Store services are installed.
And, of course, you might want to download apps from the official store, though. It’s not officially on Android’s Windows subsystem. But you can Install Windows Subsystem For Android With Amazon App Store On Unsupported PC.
System Requirements To Install Google Play Store On Windows 11 With Root (Windows Subsystem For Android)
First of all, of course, You need to meet the minimum requirements for the Windows Subsystem For Android and Install Google Play Store On Windows 11 With Root On Windows 11. The Following things are:
- The platform preview is available in the beta channel for users in the United States.
- With devices running Intel, AMD, and Qualcomm processors. This is only available in the US for now.
- You must ensure the computer is set to the United States region. Also, the computer must be running the latest build in the beta channel.
- You need to have eight gigabytes of RAM on the computer, and virtualization has to be enabled in the computer’s motherboard.
Speed Up Windows 11 | Optimization For Gaming and Development
How To Install Google Play Store On Windows 11
Step 1, Configure Windows 11 Settings To Install Windows Subsystem For Android
For the first app first, we need to check if your computer meets the minimum requirements. To do that:

Check OS Version, RAM, and Insider Program Setting
- Open the Start menu and Find the Settings. Then click on the System and open the About page.
- Under Windows Specifications, make sure that the OS-Build is 22000 and higher.
- Then, make sure that under Device Specifications, the installed RAM is at least 8GB or more.
- Microsoft also says that you need to be in the Beta channel. You must go to Windows Update and the Windows Insider Program to do that. Make sure that under the choose your insider settings, the Beta channel is configured.
Set All-Region Settings To United States
- Open the Windows Settings > Click on Time & Language > Language & region settings. Ensure you have selected the United States in the region settings on the country or region.
Enable Virtual Machine Platform and Hyper-V
The Android apps on Windows 11 also need virtualization enabled on the computer. To do that:

1. We will open Start and then search for Turn Windows features on and off and open that application. And then make sure to check the Virtual Machine Platform option.
2. I don’t know if this is a requirement. But you might also want to check the Windows Hypervisor platform (HYPER-V), then click OK and Restart the computer.
Turn On Developer Mode On Windows 11
- Go to Settings > Privacy & Security > Click on For Developers. In this section, you can see the option called Developer Mode. Click the toggle button to turn it on.
Uninstall the Previously installed Windows Subsystem For Android.
Suppose you have already installed any version of the Windows Subsystem For Android. In that case, First, you need to uninstall the existing version because we need to install a new version of Windows Subsystem for the Android package to Install the Google Play store on Windows 11.
Windows 11 Slow Startup? Most Effective Fixes Slow Boot
Method 1, Download And Install Windows Subsystem For Android
So, the next thing is to download and install the WSA package. It is the central and essential part of installing the Google Play Store On Windows 11.
1. First, download the WSA package from the source (Source 1 Or Source 2).
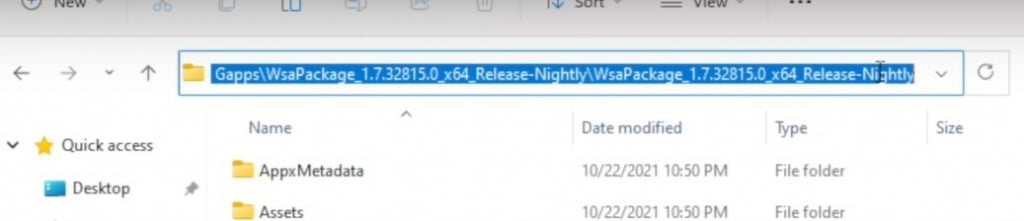
2. Once the download is completed. You need to edit the WSA package file. So go to the download location. Right-click on it and extract it to the file.
3. Open the folder. Next, open the Tools folder.
4. Now, You need to download a new file called Kernel (Source).

5. Next, Go to the download folder and copy the newly downloaded Kernel file. Paste it into the WSA package > Tools folder. It will ask you to replace the file. Make sure to replace the file in the destination.
7. Next, what we need to do is open up the Windows PowerShell and make sure you run as admin.
8. Now, you need to copy the WSA package extracted folder location. Type cd and paste the code to your path-location of the folder.

cd <package file location>Hit Enter; You are in the WSA package folder through the command. Now Install it.
9. Run the command:

Add-AppxPackage -Register .\AppxManifest.xmlHit Enter. There it is, guys. It was installed successfully. You are very close to installing the Google Play Store on windows 11. Please follow the next step.
Customize Windows 11 Taskbar – Change Position, Taskbar Size, Align Icon
Step 3, Open Windows Subsystem For Windows And Install Google Play Store On Windows 11

1. Go to the Start menu. Type “WAS” in the search box. You will see the Windows Subsystem For Android icon appear.
2. Now, Click on and open the WAS. You can see the option Developer Mode. Click on the toggle button to Enable the option.
3. Next, Click on the File option at the top. It will open a small modal window. Click on the Continue button.

4. It will open the Windows Subsystem files. You will get a notification the Google Play Store Protect is turned on. WOW!!!
Step 4, Open the Google Play Store
1. Go to the Start menu. Search for Google Play Store. Click and open the Google Play Store. At the same time, you open the G-play store. You will notice that the Google Play Store is processing and getting ready. It would help if you waited until it was finished.

2. Once the process is completed. Click on the Sign-in button. You will see that the button is not working. If that is the case, please follow the next step to Successfully install Google Play Store On Windows 11.
Step 5, How To Fix Google Play Store Sign-In Issue
I can’t be able to sign in. so I have a solution for that. If you are not able to sign in. please follow this step carefully.
1. So, You need to go into the C drive here. You can see the “adb” folder. Click and open it. Now open the Platform-tools folder. You need to open the command prompt in this folder.

2. Click on the address bar and type cmd. Press enter. It will open the command prompt to this folder location. Now, here we need to type in a few commands:

1st, Command:
abd connect <localhost address> Hit enter.
The localhost address is found in WSA > Settings. In my case, it’s 127.0.0.1:58526. Yours may be different.
2nd, Command:
adb shell3rd, Command:
suThis Command shows you that you are now root.
4th, Command:
setenforce 0
Hit enter. You are done. Go back to the Play Store and try to sign in. Click on sign in > type email credentials. BOOM!!! Now, you have successfully installed the Google Play Store on Windows 11.
Let me tell you one thing, guys. Making an article like this takes a lot of effort and experimentation. So if you share the article, that would be really appreciated.
Method 2, Install Google Play Store (+Services) & Root | Windows Subsystem for Android
Before you start, please read the system requirements and some settings that I have mentioned at the start. Otherwise, you can’t install Google Play Store on Windows 11 and Windows Subsystem for Android.
Step 1, Download Windows Subsystem for Android Appx
1. First of all, we need to download the msix bundle for installing and using the Windows Subsystem for Linux. Click on this link (Source) that’ll take you across to the download website.
Use this Settings and ProductID:
- Select the left dropdown to “Product ID.”
- Use The Product ID: 9P3395VX91NR.
- Change the 2nd dropdown to “Slow.”
Click On the “Tick” mark.
At the very bottom will find the Windows subsystem for android msix.bundle 1.2 gigabytes. We’ll be downloading this by clicking on it or opening it in a new tab. And, of course, I’ll need to tell Edge to keep this file. All we have to do is wait for the download to finish.
Step 2, Installing Ubuntu On WSL (Windows Subsystem for Linux)
So, for this, we’ll need to make sure we have Ubuntu installed and, of course, the Windows Subsystem for Linux, not the WSA.
1. Go to Windows search and search for Turn Windows features on or off. And you’ll scroll down until you find the “Windows Subsystem for Linux.” make sure that it is checked.
2. Then, we’ll head across to ubuntu.com to Download Ubuntu for WSL. Click on the “Download from the microsoft store,” or of course, you can head across to the Microsoft store yourself.
Click on the Get button and install it. I just need to wait for the download to finish. This will, of course, take some time.
3. After it’s finished. Open the Ubuntu terminal. If you experience “Error: 0x800701bc WSL 2 requires an to its kernel component”. Click on this link (Download the Linux kernel update package). On this page, go to step 4 > click on the download link.
4. Double-click to run the setup. – You will be prompted for elevated permissions. We need to select ‘Yes’ to approve this installation.
5. Once completed. Open the Command prompt as administrator and run the following comment:
wsl --set-default-version 2It will set WSL 2 as your default version.
6. Now, Open the Ubuntu terminal. Type Username and password. This time, it should be installed successfully.
Now, We can start messing around with the msix files.
Step 3, Extracting & Preparing WSA Installer.
1. First, you need to download 7-zip software and Install it.
2. Navigate to the WSA msix.bundle file that you downloaded before. Right-click on it > Select 7zip > Select Open archive. It will open the files widget.
3. You need to scroll down to the very bottom and find the release_nightly.msix. Here, simply by double-clicking on it. Wait for it to finish. Don’t close the 7zip widget. (Remember to open the correct one, this one’s x64)
4. Now, Go to C drive, create a new folder, and name it: WindowsSubsystemAndroid.
6. On the 7zip, copy all the files by pressing CTRL + A. Then unselect only three files: AppxBlockMap.xml, AppxSignature.p7x, and at the very bottom [Content_types.xml]
7. Drag all the marked files to the newly created file (WindowsSubsystemAndroid).
8. Now, get back to the C drive and create another new folder. Name it: GAppsWSA. Now go to this Github link (source) and Download the whole repository. Click on Code > Download ZIP.
9. Once the download is finished. Go to the download folder > Extract it > Copy all > paste it to the “GAppsWSA” folder.
Step 4, Downloading OpenGApps (Play Store + Services)
1. Click on this GApps link. When you get here, all you have to do is select x86_64, then 11.0, and finally, pico on the right-hand side. After selecting these options, click the Download button.
If you’re using an ARM64 device, select ARM64 instead. For most people, it’ll be x86_64.
2. Then, copy the newly downloaded zip file. Now open GAppsWSA folder > #GAPPS. And paste the entire zip into here instead of extracting it.
Step 5, Preparing a script for Root & Play Store install.
1. Open the WindowsSubsystemAndroid folder. Select only product.img, system.img, system_ext.img and vendor.img files > Ctrl + C to copy, then Go back then into GAppsWSA > images folder and Paste it into here all four of these files.
Step 6, Running Scripts
1. Now, open the GAppsWSA folder. Right-click on the empty space and select Open in Windows Command.
2. Now type the command:
wsl
sudo su
Type password.
3. Now run the following commands only by one:
sudo apt-get update
apt install lzip unzip
apt install dos2unix
dos2unix ./apply.sh
dos2unix ./extend_and_mount_images.sh
dos2unix ./extract_gapps_pico.sh
dos2unix ./unmount_images.sh
dos2unix ./variables.sh

./extract_gapps_pico.sh
./extend_and_mount_images.sh
./apply.sh
./unmount_images.sh
4. Then again, go back into GAppsWSA > Images folder > Select only product.img, system.img, system_ext.img and vendor.img files > Ctrl + C to copy and Paste it into the WindowsSubsystemAndroid folder.
5. Go back to the GAppsWSA > misc folder. Copy the kernel file. Then go to WindowsSubsystemAndroid > Tools folder and paste it here.
Step 7, Installing Rooted WSA with Play Store (+Services)
1. Go to Start > Search for developer, Open Developer Settings > Turn on Developer Mode.
2. Open Windows Powershell in administrator mode. Run this command:
Add-AppxPackage Register C:\WindowsSubsystemAndroid\AppxMainfest.xml
3. Hit Enter.
If you get any error at this point, you need to uninstall “Windows Subsystem for Android” if already installed. To check, Go to Settings > Apps > Apps & Features. Uninstall apps and rerun the command. Rerun the command. The things should work properly.
4. Once finished. Open Windows Subsystem for Android> Turn on Developer Mode. Click on Files.
5. Uncheck the “Share my diagnostic data.” Click on the Continue button. You simply need to wait for it to start up for the first time, which will take quite a few minutes.
1. Go to Start and open up the Google Play Store. Then you’ll see it’s completing a whole bunch of installations.
2. If you click on the Sign-in button and absolutely nothing happens, then you’ll need to run a certain command if your Google Playstore is running correctly. Then, you can skip this step.
3. To run these commands. We need platform tools. Download the SDK Platform Tools for Windows.
4. Download the zip file from developer.android.com. Once the download is completed, extract it into a folder. Open the folder: Right-click and open Windows Terminal.
5. Now, Open the Windows subsystem for Android here. Refresh the IP address and copy it.
6. Next, go to command type:
./abd connectHit enter.
192 192.168.205.239, which is my WSA IP address. yours is probably going to be very different. Eventually, it should say connected. If it says, fail to authenticate. It still worked.
7. Next, type:
./abd shellHit Enter.
su
setenforce 0
Now Testing Play Store on Windows Subsystem for Android
Now, you should be able to head back to the Google Play Store and click the sign-in button as usual. Then, you’ll need to sign in with a Google account, of course. After eventually logging in, the Google Play Store should open up.
Verifying Root on Windows Subsystem for Android
Your device is currently rooted. Let’s install a Root Checker. I’ll open the Play Store, and I think it was just called Root Checker. Download it and install it.
Finally, click on Verify root. You can see the message “Root access is properly installed on the device.” so you’re able to install any root tools that you usually would and customize.
IMPORTANT NOTE: Keep two things in mind.No 1. You have a couple of folders on our C drive. You’re able to delete and mess around with the GAppsWsa folder. But the WindowsSubsystemAndroid folder here is currently live. The WSA that you’re using is running out of this folder here. So deleting this will cause it to break. Don’t Delete the “WindowsSubsystemAndroid” folder.
Related Queries about “How to install google play on windows 11”
windows subsystem for android windows 11, how to download amazon app store on windows 11,how to run android apps on windows 11, wsa windows 11, windows 11 android apps release date, windows subsystem for androidandroid subsystem for windows 11 download