
Transparent Taskbar, Resize Taskbar, Resize Icon, Touch Keyboard, Align Icon, and Add Glass Effect Taskbar: We will show you how to customize your Windows 11 taskbar. Recently, Microsoft released the first insider preview build of Windows 11. so many users have already installed Windows 11 on their PCs. And if you haven’t installed the recent release of the insider preview build.
Check how you can update Windows 10 to Windows 11 without losing any data. Also, if you face any problem after installation, you can easily roll back Windows 11 to Windows 10.
So if you installed Windows 11 Insider Previews Built, you can see there are a lot of improvements and there are a lot of new features added. In this build, many users noticed there are a lot of customization options missing for the taskbar.
So, for example, if you want to move the taskbar to the right, to the left, or to the top.
The direct option for the taskbar customization is missing. You can’t find the option from the Windows settings. And if you want to resize the taskbar. There is no direct option. Suppose you want to do anything if you want to resize. You have to go to the registry editor.
So, in this post, we are going to see how to customize your Windows 11 taskbar.
Customize Windows 11 Taskbar To MacOS Dock
This section will show you how to customize the Windows 11 taskbar to look like a macOS dock.
1. So to do that, you will go to the web page called rounded taskbar on Github. Here, you will see that this is the rounded taskbar, and it will enable our taskbar Windows 11 taskbar to look like a macOS dock. The Software is called “RoundedTB.”
Here, you will see the releases on the top. You will see here finally got new updates. So this update is actually supported with Windows 11, and it also has plenty of features.

2. Scroll down. You will see here the file named RoundedTB_R3.zip. You will click on that one to download the file.
3. NOw, you will go to the downlands folder, and here you will see the RoundedTB_R3.zip file. Right-click on this file and click on Extract all.
4. So, one thing that I recommend with this extracted file is to move it to your C directory. Right-click on this file. You will cut it by pressing Ctrl + X. You will go to This PC > local disk C. Here, I will create a new folder called tweaks. In this folder, I will paste this extracted rounded taskbar file.
5. So open the file, and you need to launch the roundedTB.exe file here. You will see Windows protected your pc pop-up. You will click on More information, and you will click Run anyway. It’s completely safe.
6. So when the RoundedRB is running. You will be prompted with their welcome screen. So welcome to the rounded taskbar, and here you will see a few options:
- What’s new
- About basic options
- About advanced options
- Know issue
- Help and information
- Debug
7. Next, click on the OK button.
You can see we already have some styles set on our Windows 11 taskbar. But we can also do much more. So we can change the margin and corner radius.
- But if we click on Advanced. We can even change some – Top margin, Bottom margin, Left margin, and also right margin. These are also the spacing from the left and the right, top and the Bottom of your taskbar.
8. Make some changes with these options:

- So, Set the margin to 0 and the Corner radius, for example, to 10. Click on Apply. You will notice your taskbar corner is now rounded.
- You can see here we have three more options. Such a Dynamic mode. If I click, enable the Dynamic mode. You will see we have hidden some information on our taskbar from the right, but as you can see, it doesn’t work correctly right now.
To fix the issue. You will right-click on the taskbar > Settings > go to the Taskbar settings. > Scroll down a bit you will go to the Taskbar behaviors. Here, you need to set that bar alignment to the left and then back to the centre (if it’s already centre. however, you change it again left and then centre).

As you can see in the picture. This fixed our issue with our rounded taskbar.
4. One thing to notice is to right-click on the bottom right corner and select the option Run at startup. So this program will launch at startup. You will have a macOS dock like the Windows 11 taskbar.
IMPORTANT NOTE: One thing to notice is that this program doesn’t work very well with auto-hide. It can flicker. So I suggest to you guys that you should avoid these options. Automatically hide the taskbar.
How To Change Windows 11 Taskbar Position To Top
Check the straightforward steps to move the Windows 11 Taskbar to the top of the screen on Windows 11. On Windows 11, Microsoft is making a ton of UI changes, and one of them is locking the taskbar to the lower part of the screen.
And it eliminated every one of the options to move the taskbar to either top, right, or left. But, I will show a way To Change the Windows 11 Taskbar Position to the top.
1st, Go to the Start menu. Select the search box.
2nd, Type the word registry. And then click on the best result to open the Registry Editor settings.

3rd, Right-click on it. Select “Run as administrator”. It will ask you for user control permission; click on Yes to Continue.
4th, you need to go to the following path:
HKEY_CURRENT_USER\Software\Microsoft\Windows\CurrentVersion\Explorer\StuckRects3IMPORTANT NOTE: Before you do this, remember one thing. Editing the registry is not a good idea. So it can break the installation. You should only do this if you know what you’re doing, as always. It’s recommended to back up your computer and data before making any system changes.

5th, Create a backup file for future use if you get any error. Right-click on the StuckRects3 folder. Select the Export option. Give a name. Save the file to any location.
6th, Now, after taking a backup. Go to the right-hand side and double-click on Settings.

7th, It will open the Edit Binary key modal box. Very careful here. Go to the 2nd row and column no 6 (The FE column).
8th, Next, press the Delete key.it will delete the current value. And change the number 03 to 01. Click on OK.
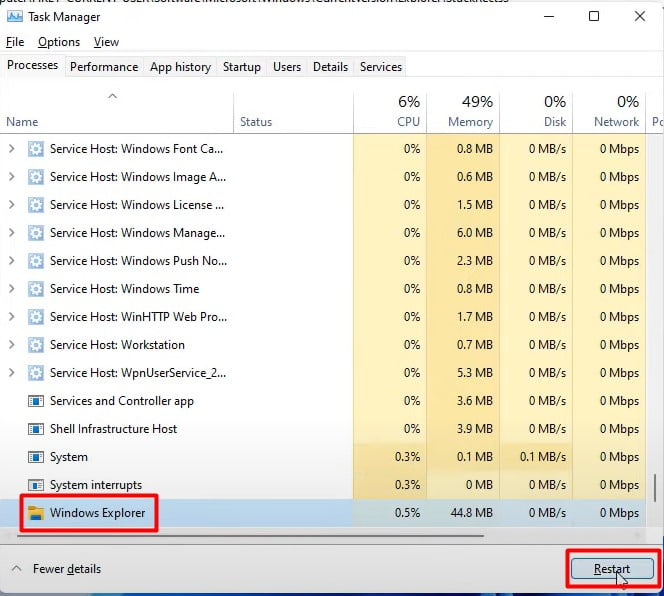
9th, Now, Right-click on Taskbar > select Task Manager. Find and Select Windows Explorer > Select Restart.
You will notice that the taskbar is appearing on the top.
10th, If you want to go back to the bottom taskbar position. Again, go to the path and change the value to 03.
These are the more variables you can try:
- If you want to change the Windows 11 taskbar position to the Left – The value is 00
- If you want to change the Windows 11 taskbar position to Right – The value is: 02
- If you want to change the Windows 11 taskbar position to the Bottom – The value is 03
Remember: Right or Left Position is very glitchy.
How To Move The Taskbar Icons To The Left Or The Center In Windows 11?
1. First, you need to open the taskbar settings. Just right-click on the Taskbar and choose the Taskbar Settings.
2. Under taskbar settings. Expand the Taskbar behaviours. in the taskbar behaviour section. You can see the Taskbar alignment.
3. You need to click on the drop-down menu. Choose Left if you click on the Left. It will move the taskbar icons to the Left.
4. If you want to bring it back to the Center. Just choose the Center. Also, you can customize Windows 11 start menu.
How To Change Taskbar Size In Windows 11
1. Go to the search box and type Regedit. Right-click on the registry editor and open it as “Run as administrator.”
2. Next, you need to navigate to this location here:
HKEY_CURRENT_USER\Software\Microsoft\Windows\CurrentVersion\Explorer\Advanced Value")
3. Now, once you are inside the advanced folder. Go over to the right-hand panel. Here, you need to create a file. So right-click on the white space and select the DWORD 32-bit value. At the bottom here, you should see a new file has been created.

4. Give the file name TaskbarSi [T and S are capital letters].
5. Now, double-click on the file. Then, you need to use the numbers inside here to change the size of the taskbar in Windows 11.

There are three-parameter you can use:
- Value 0 for small.
- Value 1 for standard.
- Value 2 for extra-large.
6. Click OK. And Exit the Registry editor.
7. Right-click on the Taskbar. Select Task Manager. Find and select Windows Explorer. Click on Restart.
How To Enable Small Taskbar Icons In Windows 11
Now, this was a feature that Microsoft removed. Hopefully, it’s temporary because that’ll be a shame if small icons do not get added in Windows 11. so many people found a way to re-enable them. Then, you have to change the settings in the registry editor.
1. Click on the search icon—type Regedit. You should see the registry editor.
2. Now, You need to expand the following file:
HKEY_CURRENT_USER\Software\Microsoft\Windows\CurrentVersion\Explorer\Advanced3. This is what everything should look like (See the picture). You need to right-click on the white space and select the DWORD-32-bit value option.
4. Type the file name TaskbarSi [Remember: T and S are capital letters].
5. Double-click on it. Change the value 0. (1 for Standard size, 2 for Large icon)
How To Get Transparent Taskbar In Windows 11 (Add Glass Effect)
We will show you the steps of installation of the application, which will help you to set the transparent taskbar on Windows 11.
1. You need to open your Microsoft store. So, if you have the Store icon pinned on the taskbar, you can directly open it from there. You can also search by clicking on the search and looking for a Microsoft store.
2. Click on it to open. You need to make sure that you have signed in to your Microsoft account. If not, please sign in before you download the application.
3. So now, here on the very top-right side, you will see a search. Just click on it, and here, you need to type translucent.

4. You can see an app called “translucentTB.” This is the one that we need. Now click on it.
5. You need to install it by clicking the Get option. Then click Install. Then, Launch the app.
6. Now, A small dialog box will open. It says, “Do you agree to the GPLv3 license?.” so click on YES. Now, once you click on yes, you will see that you got the transparent taskbar here.
Now, if you see here, your taskbar is transferring. Now, there is no background like an apple. It’s very beautiful.
How To Add Touch Keyboard To Windows 11 Taskbar
1. Go to the start menu and then click on Settings to open Windows 11 settings. Or you can right-click on the start menu and then click on Settings.
2. Now click on the Personalization option. Then, scroll down a little bit. Here, you can see the option that says Taskbar. So, click on the Taskbar.

3. Here, you can see the option that says Touch keyboard. Suppose you want to enable the touch keyboard. You need to click on the toggle button to turn it on. Now, your touch keyboard will be enabled on your Windows 11 computer.
4. Now, if you want to disable it. You need to turn this off, and the touch keyboard will go away.
How to Change The Taskbar Color From Windows 11
How to change the taskbar colour from Windows 11. the process is very similar to Windows 10. So, you need to have an activated version of Windows 11. In this case, from Windows 10 to Windows 11, you cannot do any customizations to the taskbar and other things. Unless you have windows activated, so make sure you have windows activated.
1. First, right-click on your desktop in an empty space. Go to the Personalize option > then on the left side, go to Colors.
2. Once you are in the colours window, following taskbar settings you can change:
- Where it says, Choose your color – select Custom.
- Choose your default windows mode – select Dark.
- Next, Choose your default app mode, but that is not really necessary.
- Transparency effects – You can leave it on if you want.
3. Next, When I switch to the dark theme, you will notice that Windows will automatically give me this dark taskbar. But I can do a custom colour. Select a colour from the colour board. Here, you have to check two options:
- The start taskbar and action setter.
- Title bars and window borders.
And now, you will notice the taskbar colour on Windows 11. it is really simple. You can do whatever colour you want. It doesn’t really matter. as I’ve said, the process is very similar to Windows 10.
Right-click on a grey empty area of the taskbar > select Taskbar Settings and select the option that gives you the sort of display.
Why did Microsoft change the taskbar in Windows 11?
They changed it because they wanted to change the VERSION NUMBER on Windows due to the hidden security improvements requiring BREAKING CHANGES.