
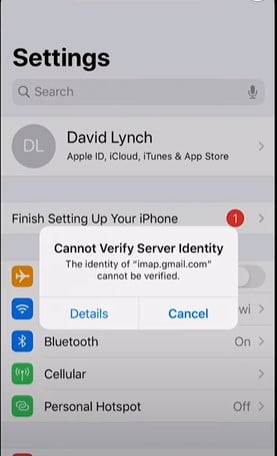
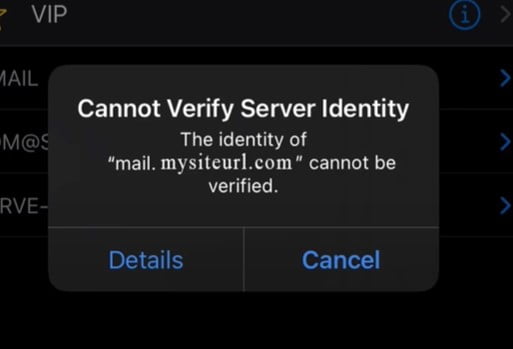
How to troubleshoot “cannot verify server identity”: I received my iPhone on the 24th, and so far, I adore it! This is my first iPhone, so I am inexperienced with it entirely. Suddenly, the next day, I noticed “cannot verify server identity” with an email iamp.hotmail.com (My case) or imap.gmail.com (cannot verify server identity Gmail error). I pressed on details, and it said it was an untrusted server.
This happened in a real sense more than 100 times, on the grounds that the popups were extremely regular – not one or the other “details” nor “cancel” showed any more information. So, is there some alternate method to check what the reason is?
I went to search for more information about the “cannot verify the server identity” issue on the web. However, there’s almost nothing about it. I comprehend that there may be network issues, yet I don’t possess a Hotmail account, and it isn’t added to my iPhone mail. Is it simply some error/bug, or am I being hacked?
I have just installed recent general applications (Facebook, WhatsApp, and some banking). I looked all over settings and couldn’t discover anything dubious, yet as I said, I’m not acquainted with this gadget yet, so I don’t have a clue what other place to check for anything doubtful.
This article will uncover a few ways to solve this “Cannot verify the server identity” problem forever.
What’s going on here? And Why does the iPhone keep springing up the “Cannot verify server identity” message?
The Wi-Fi you are interfacing with, too, seems to be attempting to assess encoded traffic to Hotmail by accomplishing something many refer to as SSL parting.
Consider your mail. If it even figures out how to download, be perused by a Wi-Fi administrator.
Reason 2,
Certificate errors can somehow be caused by a date/time issue on the gadget or on the server with which it communicates. If you don’t have a Hotmail or Outlook/Microsoft account, it is very odd you saw this. However, it probably is nothing to be stressed over.
Reason 3,
At the point when your iPhone prompts you with a “cannot verify server identity” issue, it’s revealing to you that the mail server is fake. This issue happens because of your iPhone’s strict confirmation of your mail server authentications.
So, the device will give you that message. Likewise could be a certifiable message, and somebody was attempting to guide you to some kind of hack, but if you see everything of the time, I’d expect your clock isn’t correct.
How To Fix “Cannot Verify Server Identity” On iOS 14, iOS 13 (2023)
The first thing to understand is that your iPhone, when you see this, is trying to verify the server’s identity using a secure certificate. Without getting too technical, what has to happen for this to work? Your iPhone needs to match the correct date of the certificate. It also needs to be able to connect through SSL, and those can be different ports.
Let’s fix the “cannot verify server identity” error that pops up when you’re trying to use SSL settings for your male client.
Solution 1: Check The Date and Time
The first thing we’re going to do is check the date and time settings on your iPhone.
So, Tap cancel again. Let’s get out of here. Let’s go to the Settings app, and I just want to point out that that was a Gmail error. And you can go to details, and you can trust a certificate manually. But you should never have to, especially if it’s a Gmail problem.
1st, To check this, go to Settings App.
2nd, Next, Scroll down until you get into General. Tap on it.
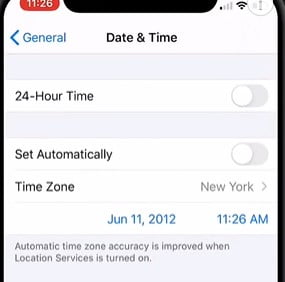
3rd, Find and tap on the date and time. Oh my goodness is set for June 11th, 2012. maybe that’s the issue. Suppose the date and time are wrong. Correct them.
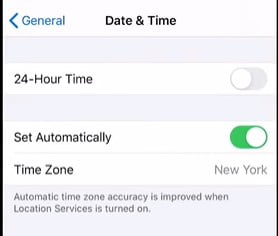
4th, Then turn on Set Automatically.
We changed it to that for making this post. Yes, we could demonstrate. What it looks like. I would recommend going back into your mail app and seeing if that actually ended up fixing the “Cannot verify server identity error.”
Solution 2: Reset the Network Setting
The next thing is Reset Network Settings. This process deletes your Wi-Fi networks, Passwords, Airplanes, VPN settings, and Cellular settings. This reset clears out your recent network settings, including customized networks, and then restores the default network options and values. If the error is attributed to incorrect or invalid network settings, then performing this reset will likely solve the “Cannot verify server identity” issue.
Here’s how it’s done:
1st, Go to Settings App.
2nd, Find and tap on the General option.
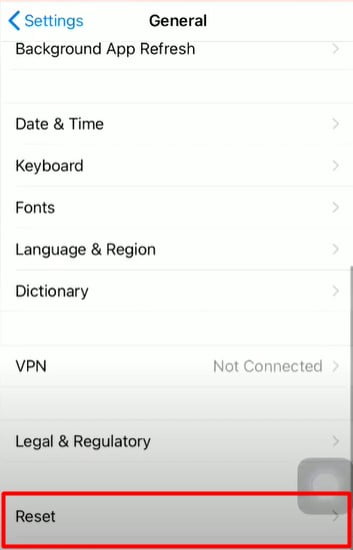
3rd, Scroll down to the bottom and tap on the Reset option.
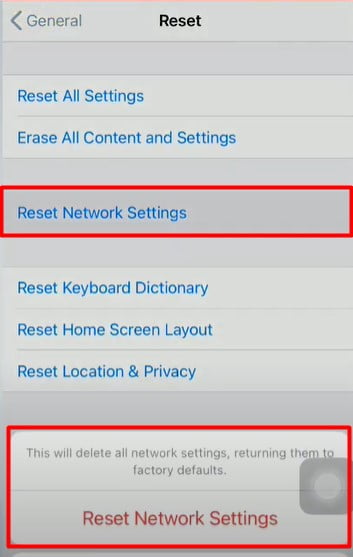
4th, tap on the Reset Network Settings option.
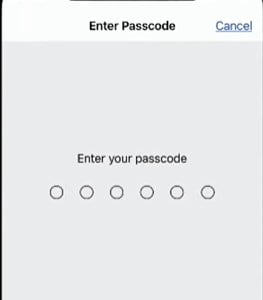
5th, Next, Enter the Password of your iPhone.
6th, Last in the pop-up box. Tap Reset Network Settings to confirm this process.
Read More: How to Turn On and Turn Off Find My iPhone in
Solution 3: Delete your Mail Account and Re-Login
If that doesn’t fix the “cannot verify server identity” problem. The secondary thing I would recommend doing is to go ahead and clear out your account information on your mail app.
So basically, if it didn’t work, you went ahead and changed the date and time settings. What I would recommend doing is going back into your Settings App.
NOTE: if you delete it from your phone. You might also just lose all your messages. They might not re-download. So make sure that you have a backup of your iPhone before you do this.
You’ll come into the Setting panel. You need to scroll all the way down until you get into the Mail option, which is below the password.
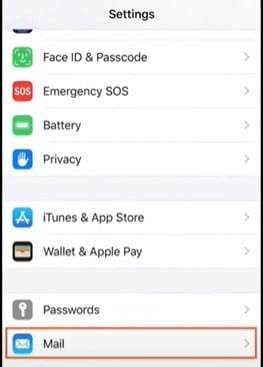
1st, So go to the Setting. And you need to click on Mail.
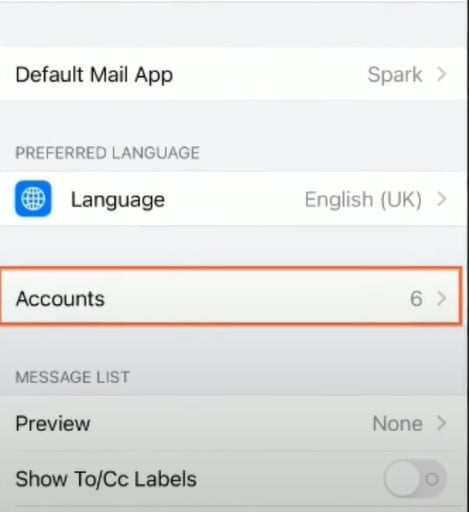
2nd, you need to click on Accounts, which is inside.

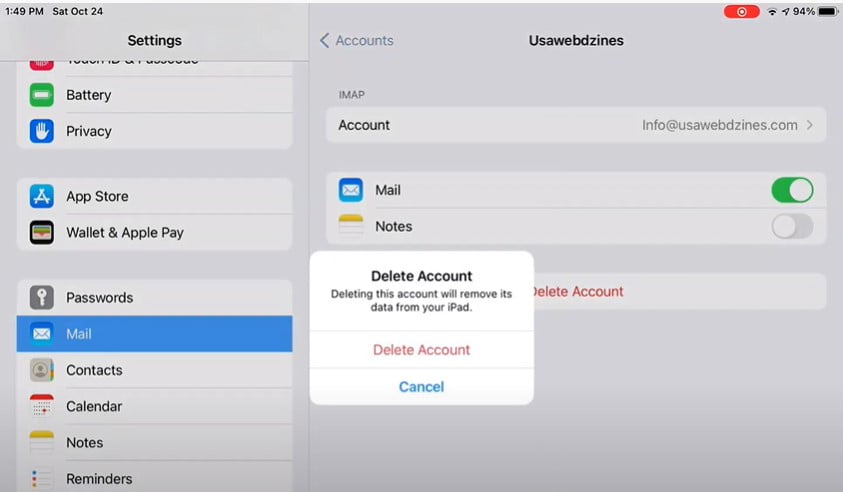
3rd, you need to go ahead and find the specific account that you want to Delete. So we’re going to delete it, and then we’re going to bring it back. So, in this case, we’re going to choose our Gmail Account. Next, Click on Delete Account.
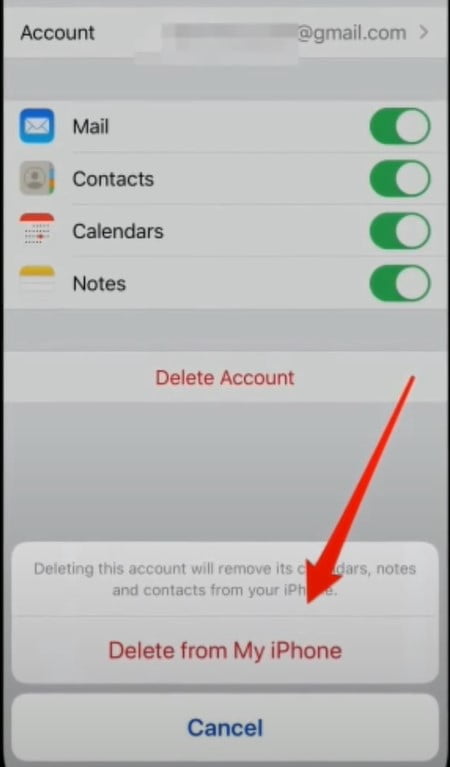
4th, It will be prompted to confirm this action. Tap on Delete from My iPhone once you are done. Then Restart your iPhone then Re-add your mail account.
Suppose you use something like a Gmail account or something. You would go ahead and sign out of that gmail account, and then, you know, add it back. That’s really the other main thing you can do.
Read More: How to Fix iCloud Sync Problems
Solution 4: Reset Settings
The next solution is to reset all settings. Resetting all settings will reset all your customizable settings to default settings. But no data or media will be deleted.
To do this,
1st, Launch Settings app.
2nd, Next, Scroll down and Press on General.
3rd, Then tap Reset bottom here.
4th, On the next screen, Press on Reset all Settings.
5th, Next, type the Passcode of your iPhone.
6th, press on Reset all settings to confirm this process.
Solution 5, For Custom Mail Account mail.mysiteurl.com
We’re going to be talking about it on the siteground.com web server and hosting. So why do you get these pop-up warnings when you use SSL, TLS, and email clients? Well, there are many reasons.
But in this section we’re going to figure out how to solve it. And how to stop that verified server identity from showing up on your iPhone and having to cancel every 5 to 10 seconds.
Follow This Step:
In Your case, the User interface might be different, but the functions are identical.
1st, You have to visit www.siteground.com (My case), or you need to go to your Email Provider site. Next, you need to Log in. okay?
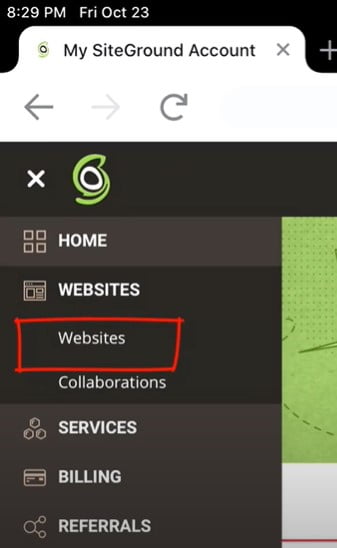
2nd, After we log in. you need to go to the Websites option.
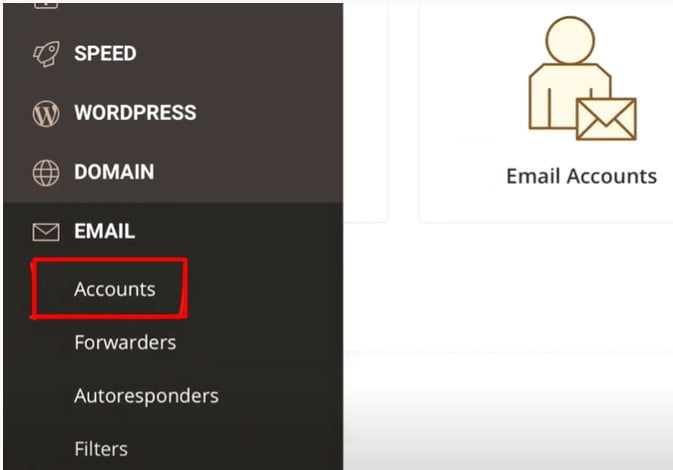
3rd, Next, following websites, we’re going to go to the Accounts option under Email.
4th, Next, You need to go to your Manage Email account’s list.
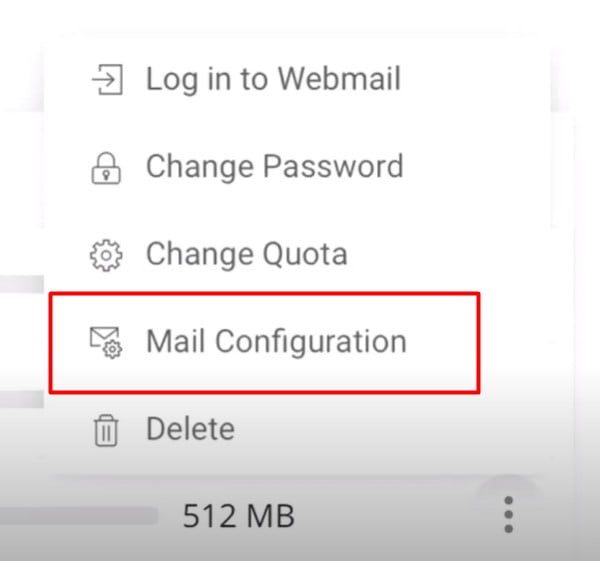
5th, Next, click on three dots on the right-hand side. A menu will open. To manage it, we’re going to go to Mail Configuration.


7th, And under mail configuration, you need to select iPhone/iPad iOS. Next, you need to click on the Create button. Once you press the create button, it will download automatically.
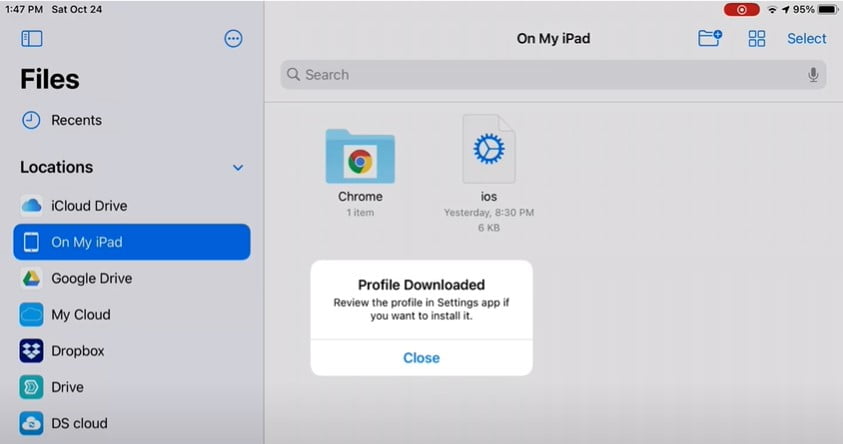
9th, Once you download it. You need to go to your folder on our iPad profile. You can review it in a settings app if you want to install it.
10th, You need to go on our iPhone or iPad Mail option. Okay, and we’re going to remove the account that we had set up. Because first, you need to delete it all right.
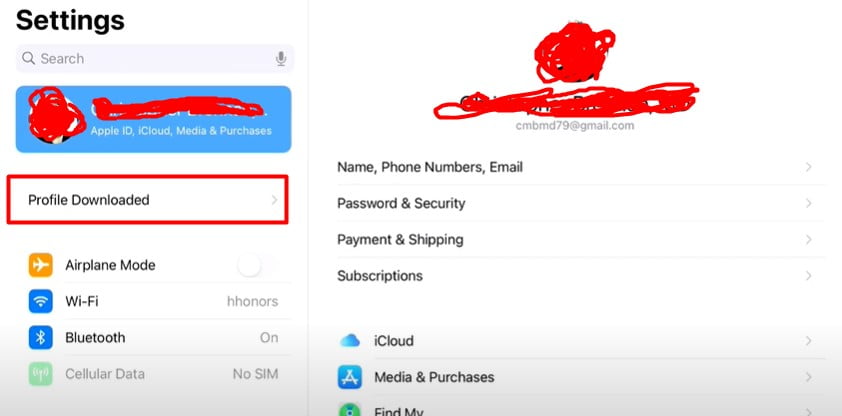
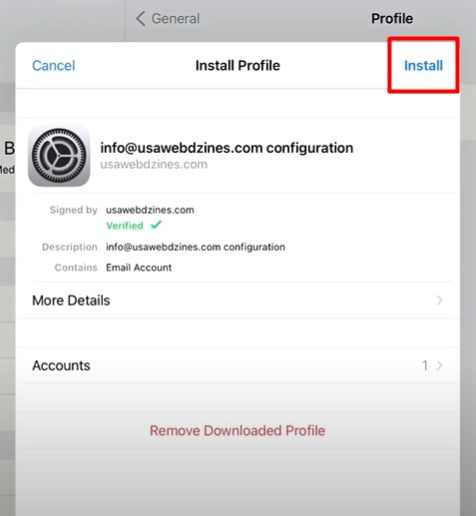
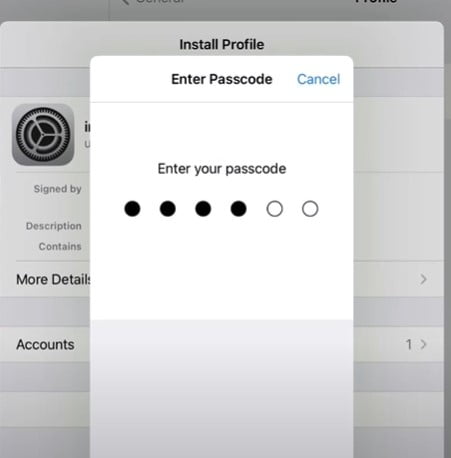
11th, Now is going up, and you’re going to see your Profile Downloaded. Once you see the profile downloaded, click on it. You’ll go ahead, and you’ll install by selecting install. Enter your iPhone/iPad Password.
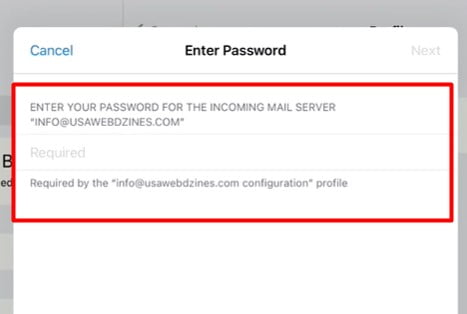
12. Next, Enter your email password.
This will install the configuration file. This will basically install the profile that will automatically set up the email account on your iPhone or iPad. You’re pretty much done.
Now, there are no issues with certificate verification. You should not have that ever pop up anymore, and everything should be great.
Solution 6: Reconnect The Wifi
The next thing is getting “cannot verify server identity” when connecting to wifi. Disconnect from Wi-Fi. And try using cellular data. Yes, if you’re connected with cellular data. Disconnect or connect to a Wi-Fi network, like it the library, McDonald’s at home, or anywhere. Try to do it. If you noticed the same “cannot verify server identity” problem, it’s not a network connection problem.
Read More: How to Install Fonts on the iPad in 2021
Solution 7, Force Restart Device
Okay. We should begin with the main arrangement – Force Restart, a really handy solution for some iOS issues, particularly some type of software glitch like iOS update turned out badly, etc. It is somewhat unique to perform with various models.
Whenever the gadget gets stuck, a force restart is consistently the initial step to go, which is free and requires no PC.
1st, Delete Your Sign-in account from the phone.
2nd, force restart your device if you have an iPhone 5s,5, 6s,6,6s plus; then Press and Hold the Sleep button and Home button until the Apple logo appears.
If you have 7 and 7 plus, Press and Hold the Volume Down button and Sleep Button until the Apple logo appears.
If you have an iPhone XS, X, XR, or XS Max, follow these steps to do:
- Press and hold the Volume Down/Up button and the Wake/Sleep button together until the slider appears.
- Hold and drag the Power icon from left to right. Now, your iPhone goes off totally.
- After that, wait for 20 to 30 seconds. To turn on your iPhone back, just press the Side button again.
3rd, open Settings app. In the settings page, scroll down to find Mail. Then, Account, click on it.
4th, Next, click on Add Account. Then click on Google or Gmail. Enter your email and password to sign in again.
Read More: How to Use FaceTime App on Mac
Solution 8: Update Your Software
Suppose that doesn’t solve it either. Also, it should simply say that arbitrarily started occurring out of nowhere. I would most likely prescribe you to feel free to update your iPhone.
Things like this can happen haphazardly, with random updates here and there. So, as you most likely are aware as of now, by updating your iPhone. You can likely fix most of these issues.
1st, go ahead and go into your Settings.
2nd, Now click on General. You need to click on Software Update.
3rd, You need to download the most up-to-date version of software that your phone supports.
In this particular case. iOS 14.5 developer beta 5, I suppose, is the one I’m feeling free to go and download. So, I’d suggest downloading the particular update and installing it. And then pretty much going on from there.
At this point, you should be good to go, and this is probably where I would recommend you guys to go ahead and check your mail app and see if the Cannot verify server identity error is fixed.
Solution 9: Restore iPhone In DFU Mode
What is Apple DFU mode?
DFU means “Device Firmware Update.” A DFU restores the most profound kind of restoration that you can do on an iPhone. It takes all the program off and returns it on once more. Since it influences the iPhone’s firmware and not simply its software, a DFU restore can even fix some hardware or cannot verify server identity issues.
What do you require?
You need a Mac. An iPhone lightning Cable. What’s more, you’re going to utilize Finder or iTunes as an apparatus.
It’s not to be your Mac. It may very well be anybody’s PC as long as they have Finder or iTunes. You will utilize iTunes if your PC or a Mac runs any operating system version earlier than MacO Catalina 10.15.
So, in the event that you have 10.15 or the latest version on your Mac, you will utilize Finder because iTunes is gone. It doesn’t make any difference if your iPhone is on or off.
To do,
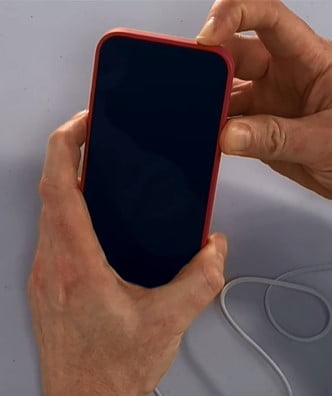
1st, let’s Plug the Lighting Cable into a Mac or PC. You can’t place an iPhone into DFU mode except if it’s connected to the PC. So I’m going to connect my phone.
So you’re running the most recent version of the operating system on Mac. In this section, we’re going to utilize Finder for this process. (I also will show you the iTunes).
NOTE: Remember that a DFU restores each and everything on your iPhone.So, ensure you have a backup before you start.
2nd, It gets going like a hard reset :
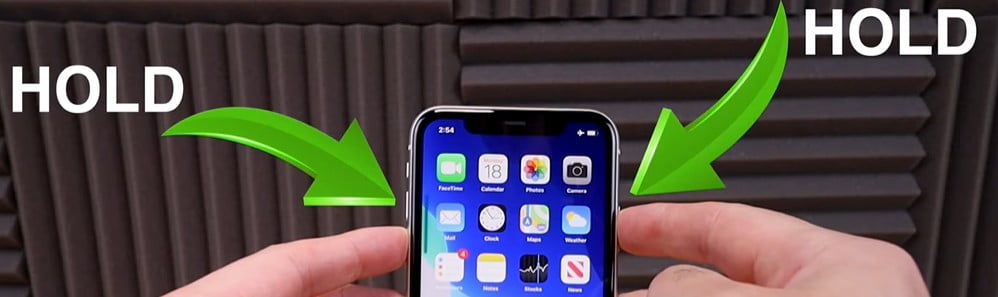
- Rapidly press and leave your finger on the Volume Up key.
- At that point, press and leave the finger from the Volume Down key.
- Afterward, press and hold the Side (Wake/Sleep) button for 10 seconds until your iPhone goes into recovery mode (Screen Turns Black).
- As soon as it turns black, Press the Volume Down key and keep holding the Side (Wake/Sleep) key for 4 to 5 seconds. (For iPhone 7 or 7 Plus, Now press these keys for 8 – 10 seconds.)
3rd, After 5 to 6 seconds, leave your finger from the Side (Wake/Sleep) key only but simply continue to hold just the Volume Down key for 10 sec (Home Button if iPhone 6s and past version) until your iPhone appears on your PC in Finder for my case. Or then again on iTunes on your older PC or Mac.
NOTE: If the Apple logo shows up, then it fails; you pressed the Sleep/Wake key excessively long and need to start again first.
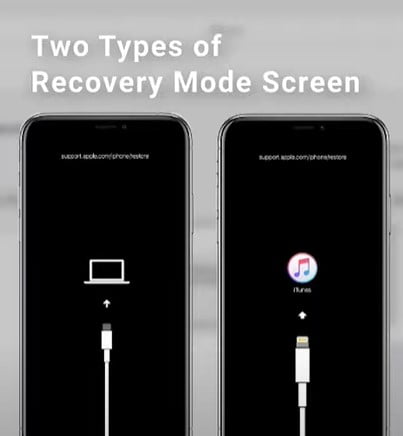
6th, if your iPhone screen is thoroughly dark. You have effectively placed it into DFU mode. In the event that you see anything on the screen at all, you’re not in DFU mode.
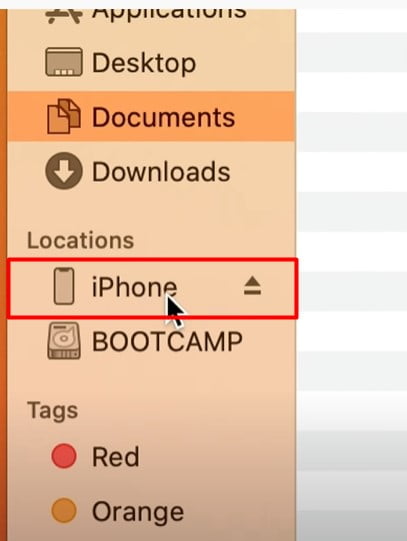
7th, So look on my Mac. You can see the iPhone appeared here on the left (See above picture). It says the iPhone is in recovery mode.
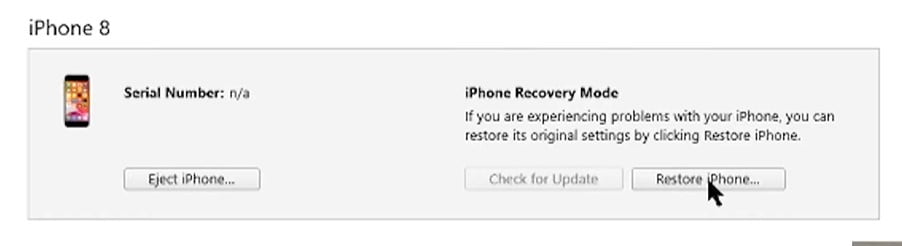
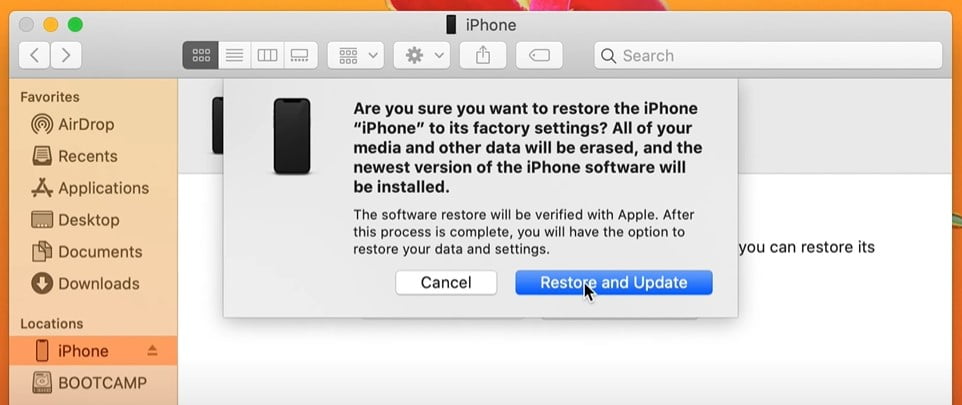
8th, Then I would simply click on Restore iPhone. And afterward, click on the Restore and Update button.
Presently, you should simply wait. It may require some time. Show restraint. Whenever it is finished, you’ll get a message to leave your iPhone or iPad connected. So keep connected. At that point, your device will reboot and return to normal again.
9th, I will naturally download the most recent version of the operating system from Apple’s official site and afterward install a solid new copy on my iPhone.It will fix your iPad or iPhone “cannot verify server identity” issue forever.
People Also Ask
Why does my iPhone keep saying “cannot identify server identity”?
It may be a conspicuous one, but it is your clock, right? Now and then, if the clock is excessively far ahead or behind SSL certs that confirm sites are who they say they are can seem, by all accounts, to be outdated.
How might I stop this issue from popping up in Apple Mail “Apple.imap.mail.Yahoo.com” cannot be verified by Mail”?
In particular, here are the settings you need:
Outgoing Mail (SMTP) Server
Server – smtp.mail.yahoo.com
Port – 465 or 587
Requires SSL – Yes
Requires authentication – Yes
Incoming Mail (IMAP) Server
Server – imap.mail.yahoo.com
Port – 993
Requires SSL – Yes
Your login info
Email address – Your full email address ([email protected])
Password – Your account’s password
Requires authentication – Yes
If you need explicit directions for your mail client or application, contact its maker.
How does to address “cannot verify server identity” on the Mail application?
I have a similar issue. Would you say you are utilizing WiFi or regular mobile data use? My concern was the WiFi. I changed to mobile information, and afterward, everything worked.