
What is bloatware?
Bloatware is undesirable software that appears preinstalled on your Windows 10 when you initially get it. In the event that you don’t find a way to Remove Preinstalled Bloatware From Windows 10,
you’ll be left with it always, contaminating your Start menu and hard drive, enticing you to play characterless games, and messing up your menus with supported tools you’ll never use.
You can uninstall or remove some of this unwanted software in the standard step, but few are more stubborn, so to remove them you’ll have to run a few commands into PowerShell.
Toward the finish of this post, We’ll show you flawless PowerShell content that removes bloatware from Windows 10 completely – as long as you’re glad to forget any decision about what stays and what goes.
Now investigate your Start menu. If it’s messed up with unused symbols that have been around since your Window 10 was new, there’s no better an ideal time to remove it.
Let start with a simple method to Get rid of Windows 10 Bloatware
Step 1
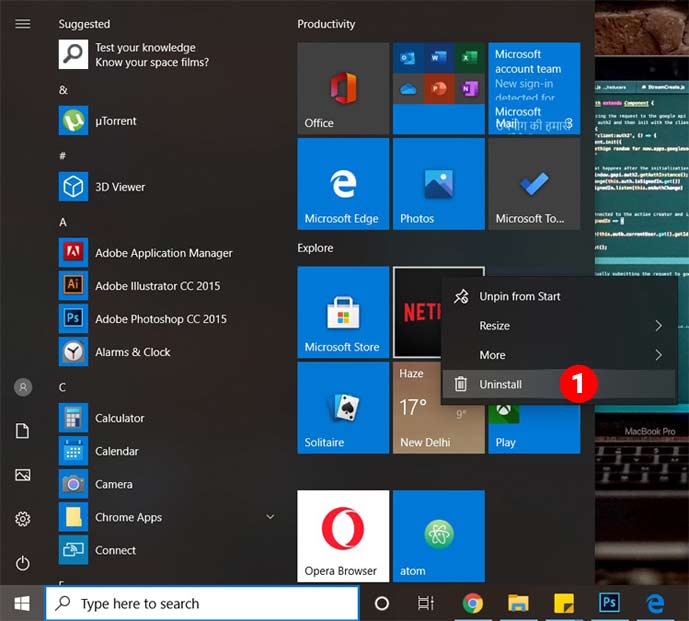
At whatever point you need to uninstall some software, it’s ideal to attempt the standard Windows strategy first. Locate the unwanted software on your Start menu and right-click it. then Select Uninstall,(See above Picture 1) at that point click on Uninstall again to finish the step. With a digit of karma, Windows will get rid of the bloatware with no further confusion.
Step 2
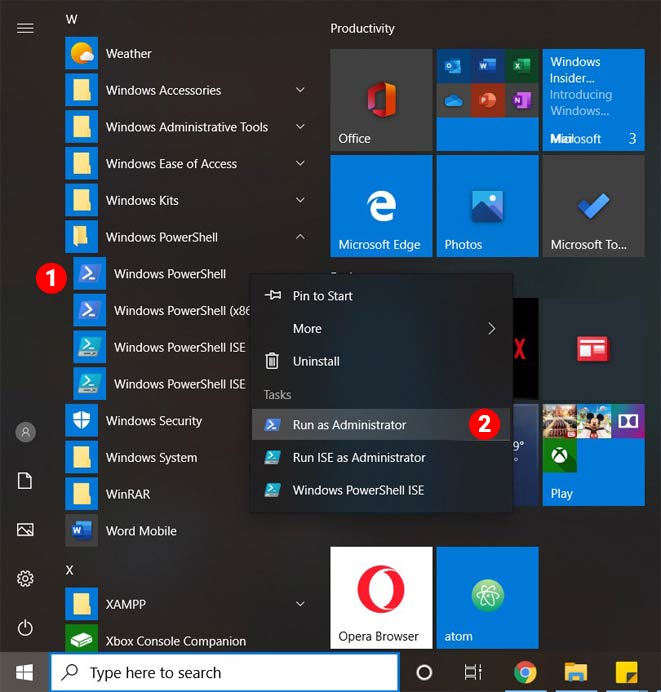
Maybe there is some software on your Start menu that you need to remove just for the current user. You are able to do this by hiding them. Despite the fact that it might look like a little progress, the most straightforward method to accomplish this is to use Windows 10 PowerShell. Find out Windows PowerShell in the Start menu [1] and run it in administrator mode[2].
Read More: How to Make Your Windows 10 PC Run Faster
Step 3
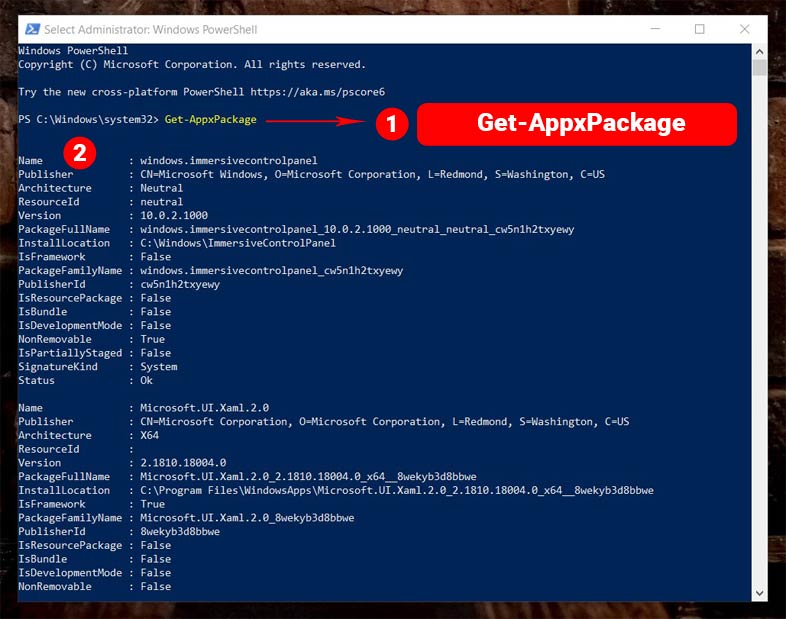
Now time to type the first command: Get-AppxPackage [1] and hit the Enter key. PowerShell gives you a list of all the preinstalled software [2] you need to uninstall. Look and choose the ‘Name’ from the list section for the software you need to get rid of. We’ve collected a couple of basic models in our Expert Tips that we mentioned below.
Here is a list of some of the bloatware apps (Get rid of windows 10 bloatware) you’ll require for the Next Step:
Photos: photos
3D Builder: 3dbuilder
Phone APP: windowsphone
Get Office: of ficehub
People : people
Get Skype: skypeapp
Store : windowsstore
Get Started: getstarted
Voice Recorder: soundrecorder
News: bingnews
Weather: bingweather
Sports: bingsports
Money: bingfinance
Xbox: xboxapp
Groove Music: zunemusic
Calendar and Mail: windowscommunicationsapps
Calculator: windowscalculator
Alarms and Clock: windowsalarms
Step 4
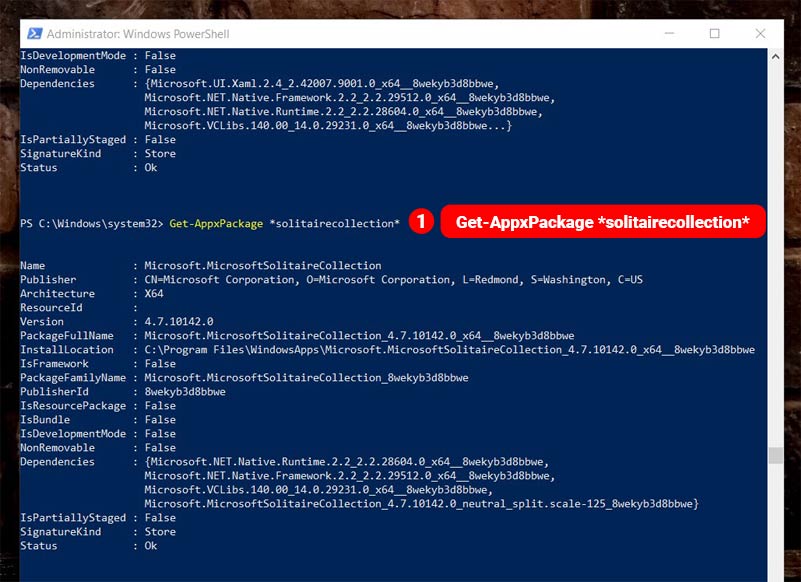
Presently type the command: Get-AppxPackage *name*, don’t remove the two asterisks sign but change the name to the name of your selected software. Like this Get-AppxPackage *solitairecollection*. You don’t need to type the entire thing – the asterisks will catch most things. Hit Enter. If PowerShell returns with more than one software, write more of the name between the asterisks sign to guarantee there’s just one result.
- Elden Ring: Savegame Manager Guide (Import, Download, Backup, Restore)

- Is LSFG’s Frame Gen Worth Buying for Any Game & GPU? Games Emulators (Old/New)
- What Role Does Automated Testing Play in Software Engineering?
- How to Lower Your Ping Using a VPN?
- How To Remove Activate Windows 11 Watermark Permanently?


Step 5

Presently you can uninstall the application by composing the command: Get-AppxPackage *name* | Remove-AppxPackage and hit Enter. Keep in mind, this only removes preinstalled bloatware from windows 10 for the current logged user account, so it’s as yet accessible to your PC’s different users. Now you learn one method to Remove Preinstalled Bloatware From Windows 10.
Deeply Remove Preinstalled Bloatware From Windows 10
Step 6
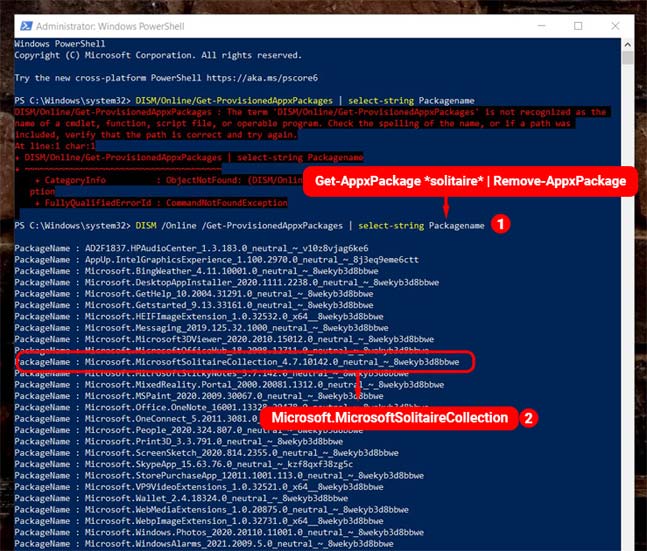
To totally remove from your PC a specific bit of bloatware, type the command: DISM /Online /Get-ProvisionedAppxPackages | select-string Packagename [1]. See through the list of things PowerShell shows to notice the application you need to remove.
Read More: Choose Best Apps for Windows 10
Step 7
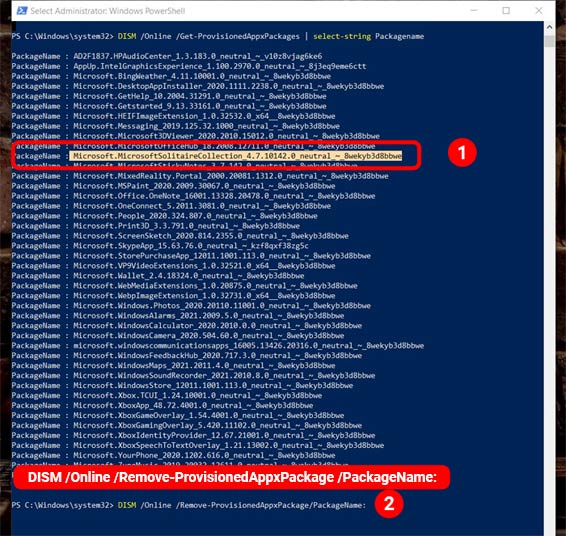
Mark the software’s PackageName[1]. Remember that this will remove the application totally for all users. Press Keys Ctrl+C to copy the name and paste it to the clipboard. At that point type Command: DISM /Online /Remove-ProvisionedAppxPackage /PackageName:[2] But don’t hit Enter yet.
Step 8
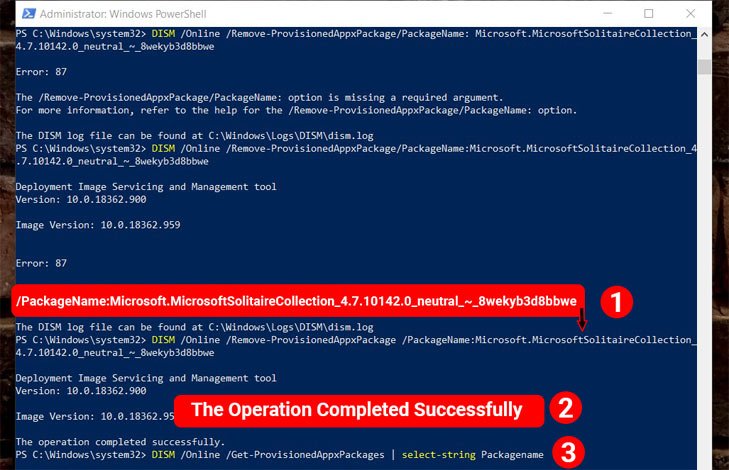
After the command line, paste the PackageName by pressing the keys Ctrl+V that you copied before to the clipboard. Now Hit Enter. A confirming message appears that you have removed the application. You are able to check it’s successfully removed by re-typing DISM /Online /Get-ProvisionedAppxPackages | select-string Packagename.
Read More: How to Open Action Center in Windows 10
Step 9
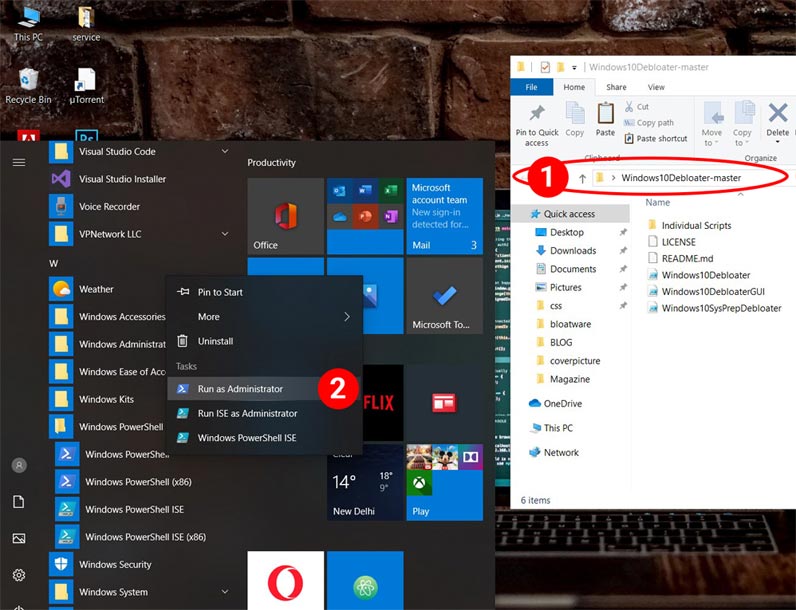
If you’d preferably eliminate all your bloatware in one go, Recommended downloading Windows 10 Debloater (this is an important file that helps you to remove preinstalled bloatware from windows) from the GitHub package. Click on the button called “Clone” or “Download Zip”, save the file and unzip it to a convenient folder. At that point again open the PowerShell as an administrator as you did before (in Step 2).
Step 10
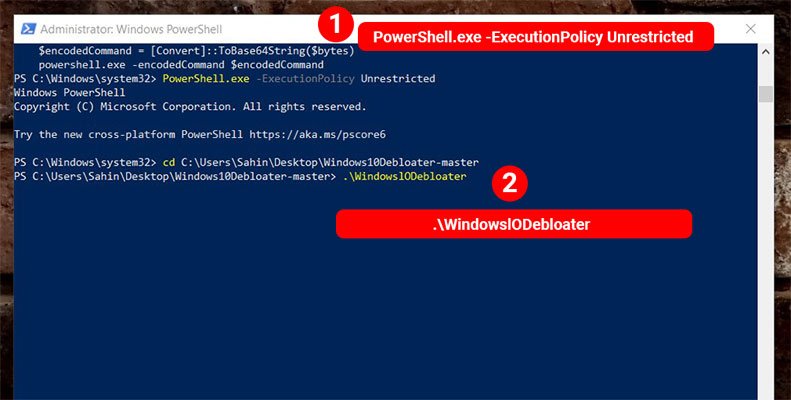
Type the command: PowerShell.exe -ExecutionPolicy Unrestricted. Use the “cd” command to go to the folder where you unzipped the downloaded file to – for our situation cd c: \Users\ sahin\ Desktop\WindowslODebloater-master.Then type the command: .\WindowslODebloater and consent to everything. At that point wave farewell to all your bloatware from windows 10.
If you used this guide to remove preinstalled bloatware from windows 10. please give us your opinion.
How to Reinstall All Bloatware Apps
If you determine that you need the pre-installed bloatware applications again, you are able to reinstall them with a single command of PowerShell. Once more, open a PowerShell window as Administrator. Copy and paste the following command on the PowerShell window, and afterward Hit Enter:
Get-AppxPackage -AllUsers| Foreach {Add-AppxPackage -DisableDevelopmentMode -Register "$($_.InstallLocation)\AppXManifest.xml"}
Above this line advises Windows to reinstall those default applications once more. Wait for a while and allow it to complete, regardless of whether nothing seems to occur from the outset. If Powershell throws any error, restart your PC, and afterward analyze your Start menu—you may simply have every one of those pre-installed applications back once more, in any case.
Once more, just a genuine advantage to doing this is some mellow cleaning up of your Start menu. All things considered, future updates (particularly significant updates) could install the applications.