
I know every one of you saw the title, which is the way to take screenshot on Windows 11. So I’m thinking, alright, everyone knows how to take screen captures. Well, I felt exactly the same thing until I started utilizing windows once more. Also, I was missing a few features.
You Should Know
- Win+Shift+S allows you to choose a section or window from the screen.
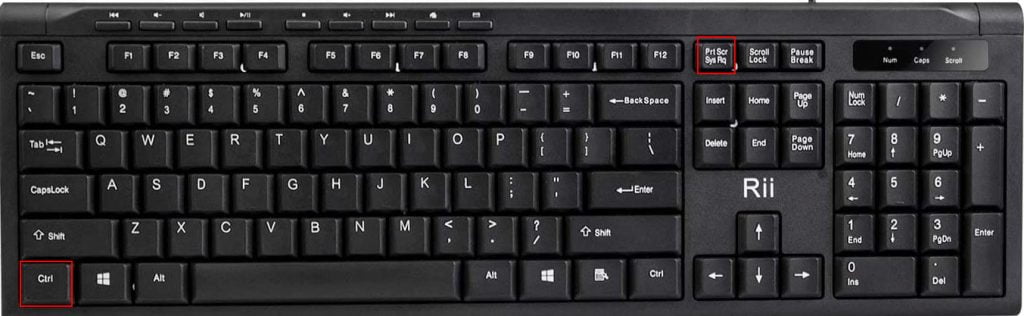
- PrtSc Screenshots of the entire screen. Saves to clipboard.
- Win+PrtSc saves fullscreen screenshots to Pictures > Screenshots.
I was a long-time mac user, and there are some straightforward methods to take a screenshot on the mac. You can try:
- Press Command + shift + 3 – It is a full-page screenshot.
- You can press Command + Ctrl + Shift + 3 – it takes a full-page screenshot and saves it to the clipboard automatically.
- Also, you can press Command + Shift + 4 – which will take a screenshot of the part of the screen that you want by just you can click and drag and it takes.
- Also, Press Command + Ctrl + Shift + 4 – It will copy a part of the screen and the screenshot to your clipboard, and you can paste it into whatever app you like.
How To Take Screenshot On Windows 11
I got back to the windows a short time ago. I looked OK. Where are these features on Windows 11? Are there many more methods to take a screenshot than what we’ve seen before on windows? Also, that got me on an excursion that drove me to write this article, where I’m going to explain to you some fantastic better methods to take screenshot on windows 11.
1. Take a Screenshot of the whole screen in Windows 11
So there are two ways to do this.
1. First, is to press the Windows key along with the PrintScreen button. then you can go to the Pictures library on your computer. you can find this by going to explorer.
2. You need to press the Windows key along with E (Win+E) to go to FIle explorer.
3. And in the left sidebar. Click on the Pictures folder. Now you can see the screenshots folder here and open the folder. all screenshots are saved here. The screenshot is named with the screenshot and there will be a number next to it.
Method 2,
Another quick way to do this is,
1. Just press the PrintScreen button.
2. Open MsPaint and press CTRL+V to paste the screenshot in MsPaint. you can now save it anywhere you like.
2. How to take Screenshot for a specific App on Windows 11
If you just want to take a screenshot of a specific app or a window. that you’ve opened. just follow these steps:
1. Click on that app, you need to take a screenshot of it. make sure the app is all above than other apps and not behind other open apps.
2. Now, press ALT + PrintScreen. Open MSPaint. press CTRL+V. and this will place the screenshot of the open window in paint. Now you can save the screenshot anywhere you like.
Read More: Windows 11 BIOS Settings [Enable UEFI, TPM]
3. Take a Screenshot On Windows 11 Using the Snipping Tool
Suppose you want to take a screenshot of a part of the screen in windows 11. then you can use the windows snipping tool here.
1. How can you do that? First, open the Snipping tool, which used to be called the Windows Snipping Tool. You can open it by going to the Start menu, using the Search box, type the Snipping tool if you want easier access in the future. You can pin that to the Start menu, which shows up where all these apps are.
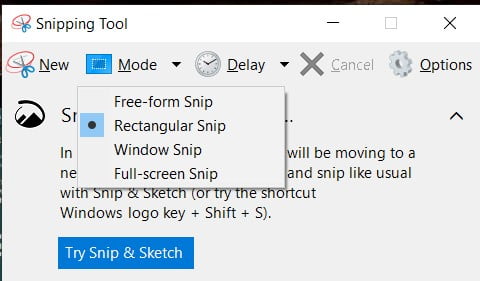
2. Click the down arrow next to the NEW option: select Rectangular snip or free-form snip. If you select “Rectangular snip,” It’ll allow you to capture a rectangular screenshot.
3. The “Free Form snip” option will allow you to draw any shape on the screen and take a screenshot of that part. The First snip is, you need to left-click with your mouse. You need to hold it, and then you need to drag it to the desired length of your snip.
4. Once you’ve done this. You can use the snipping tool to edit the screenshot if needed and save it to your computer.
4. Take a Screenshot with the snipping sketch tool in Windows 11
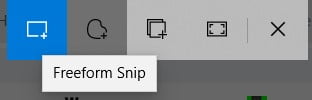
1. You need to press “Windows key + Shift + S” to open the snipping sketch tool. Here you can see similar options.
- Rectangular Shape.
- FreeForm Shape.
- Window.
- Fullscreen.
5. How to take a screenshot via the Game Bar in Windows 11
Xbox Game Bar is a customizable gaming overlay to capture, create, and connect, built right into Windows 11.10. See how to take screenshot on windows 11.
1. During your game, Press “Windows Key + G” to call up the Game Bar.
If you do not get this, don’t worry,
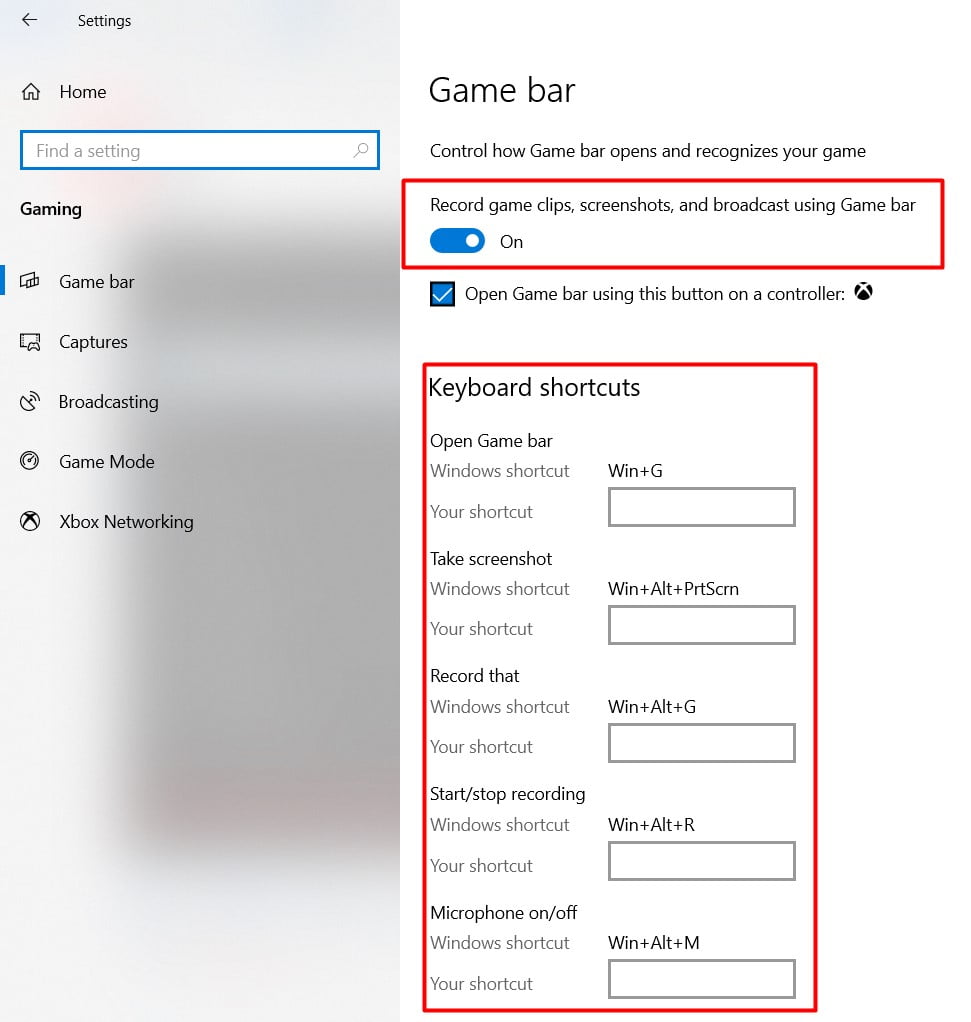
- On your desktop. Right-click on the Windows logo. Then click on Settings. In all settings, click on the Gaming option.
- In the game, the setting makes sure that the option “Record games clips, screenshots, and broadcasts using the game bar” toggle is switched on. if not, just slide it to the right and turn it on.
- Now you are able to change the shortcut. by default, it is Windows + G. so you are able to configure the keyboard shortcuts.
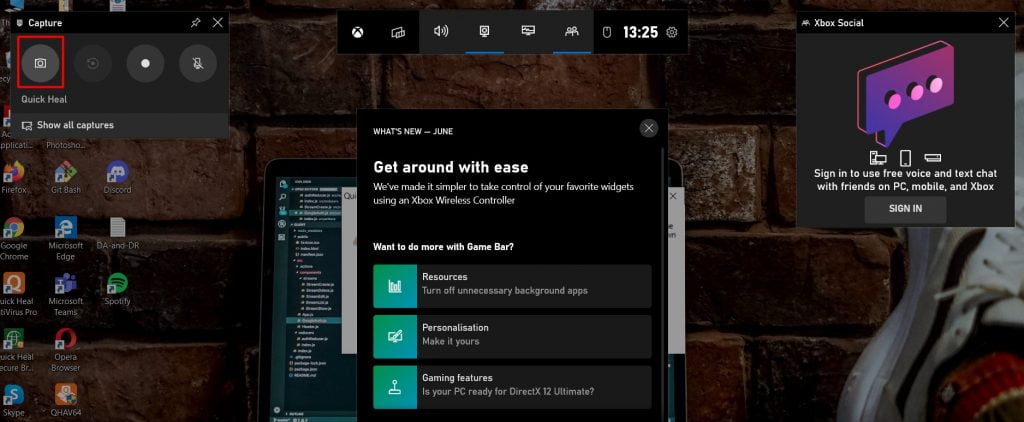
2. Open the “Broadcasting Capture” option in the “Game Bar” menu and take a screenshot by clicking on the Camera icon.
3. As a pro tip, pinning it will make it even easier to capture or stream while you play. Once you capture it, you can edit it and can add overlay text to instantly make a meme. When you have your meme ready, you are able to share it on Twitter or send it in a message to your Xbox friends.
Read More: Best Free Video Editing Software For Profession
It also gives a few cool things:
- It gives you a nice overview of CPU usage, GPU, and RAM.
- You’re able to control all your audio in one specific way.
- The broadcast and capture tab allows you to take screenshots, pause your recordings, start your recordings, and also mute your microphone.
Top 4 Best Third-Party Free ScreenShot App For Windows 11
Suppose you’ve at any point taken a screenshot with the features incorporated into your internet browser or operating system. Then, at that point, you definitely know there are many impediments. Fortunately, there is free screenshot software to capture anything on your screen that is more component-packed to help you take your screenshots to a higher level.
In this best 4, I have shown the most flawlessly awesome free screenshot program. Using this you can easily take screenshots on windows 11, which are all accessible for windows alongside a couple of coming up that can also be used on macOS.
No 4, Monosnap
With using this program, and the others coming up, are not at all like this screenshot software built into many internet browsers and browser expansions. You’re not restricted to exactly what is situated inside your browser window.
Monosnap is not difficult to use for novices. It will allow you to capture your whole screen, a selected region, or any open window.
Features:
- Capture full screen, area, or window password.
- Create perfect pixel screenshots.
- Highlight details.
- Hide sensitive data with Blur Tool.
- Export to a favorite external editor.
- Drag & Drop Share it on Facebook or Twitter or upload it to google drive, dropbox.
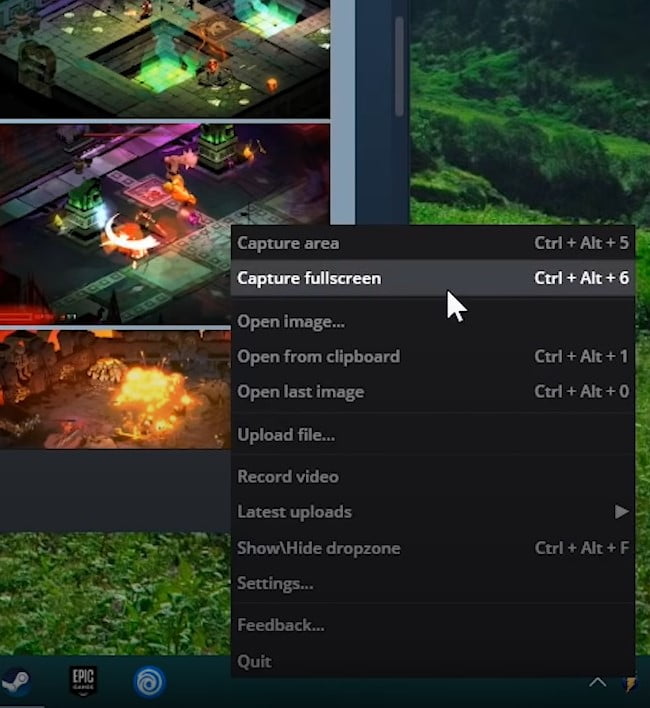
No 3, Greenshot

Suppose you need only a simple tool. This is open-source software, and for quite a while, was a top choice for some users while doing a screenshot. It’s as yet probably the ideal program to utilize a screenshot to do a screengrab.
You have various options. You could save the screenshot to your PC, copy it to the clipboard, open it’s anything but a Microsoft Office program or open it in the Greenshot picture editor.
Click on the Greenshot icon located in the Taskbar. You can see many typical options to capture an area window and a full screen.
No 2, TinyTake
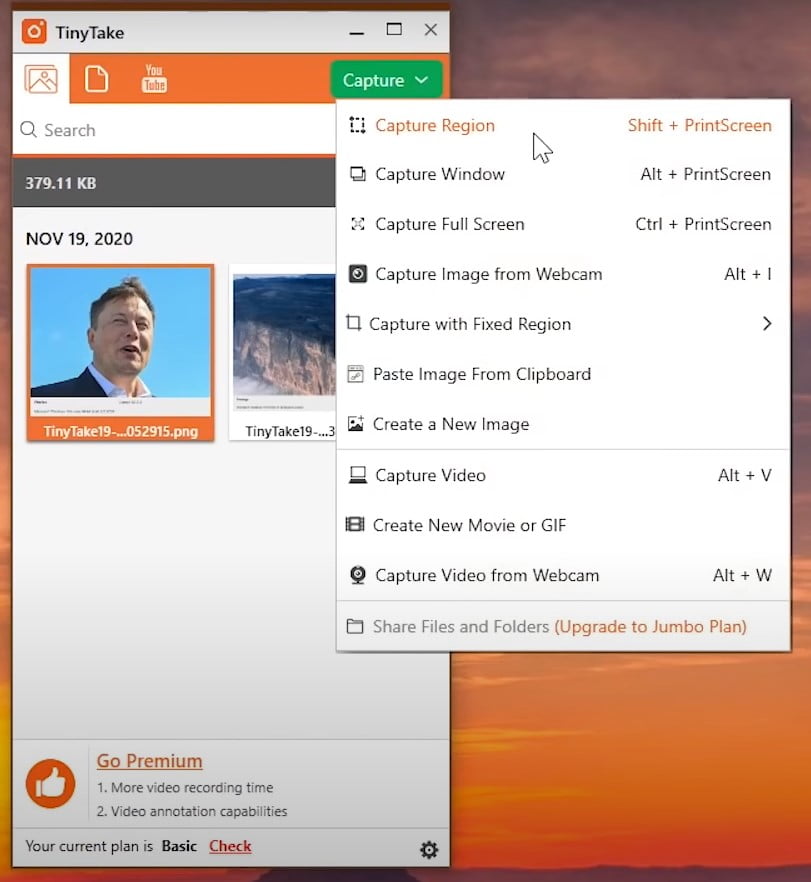
This is the best one compared to other free video software programs. It’s likewise very handy for catching anything on your screen for any circumstance. Also, there are different methods to take a screenshot. Moreover, it’s anything but a robust toolset in-build editor to improve your picture that can be shared with anybody you need.
In contrast to our number 4 pick, TinyTake incorporates a graphical UI and more options to take screenshots on windows 11 screen.
Features:
- When you select capture,
- You can capture regions,
- Window,
- Fullscreen,
- Image from webcam,
- A fixed region,
- An image from your clipboard or
- Create a new image in their editor.
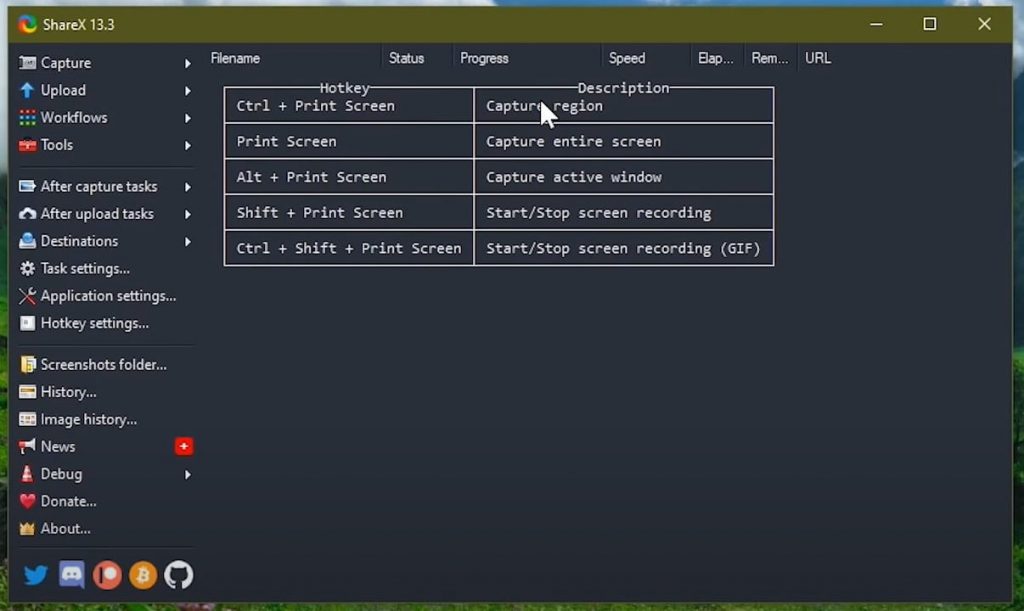
Sharex isn’t unquestionably the most awesome screenshot utility. It’s the most element stuffed of any free screenshot instrument that you can get for power people. It incorporates in excess many different ways to take screenshots. It’s also totally free open source and light on framework assets accessible for Windows 7 or the latest version.
I use a considerable amount of this article as the scrolling capture to give the illusion that you are scrolling down the page after taking a screenshot on windows 11. You can upgrade it with their in-built editor with a few options to select from.