
Troubleshoot Discord Update Failed Loop on Mac and Windows: We’re discussing how you can fix the Discord update failed problem. Discord is a free text and voice application accessible for mobile and desktop. discord is focused on a gaming crowd and has a functionality and smooth look. That falls somewhere close to Telegram and Skype.
When utilizing Discord, you take part in themed servers. Anybody can make their own server. After they become a discord member. You can welcome users to join your discord server with a link.
However, people deal with certain issues when they use Discord. Quite possibly, the most well-known issue is the discord update loop or discord update failure.
What Exactly Discord Update Failed or Update Loop is?
You are trying to turn on Discord at the start of the day. Since you need to spend time with your friends. And there’s been an update.
And the only thing that continues happening is it simply keeps acting like it’s downloading precisely the same file again and again and over once more, regardless of how many times you restarted.
How frequently do you just let it sit? Also, you stand by throughout the day. It simply has something wrong. What’s more, there are a few different ways that you can fix the discord update failed loop. The easy way doesn’t include reinstalling everything and re-putting your data. It’s just to mess with the updated file itself.
But If this method doesn’t work, then you can execute the clear installation method.
How To Fix Discord Update Failed Issue On Mac

1. First, Open the Spotlight search—type Activity Monitor. Click to open the Activity Monitor. Then, find Discord. Click on the Cross icon to force quit.


2. Now, Click on the Go option on the top bar> Select “Go to Folder.” Now navigate to the following folder path:
~/Library/Application SupportJust copy the path and paste it to navigate the folder.
3. Once you are in this folder. Find the discord folder. Right-click on the folder and select the “Move to Trash” option.
4. Again, Click on Go > select Go to Folder. Now navigate to the following folder path:
/Library/Application SupportCheck if a discord folder is available. Just Delete it.
5. Next, Click on Go. Select “Application.” Then, right-click on the Discord app. Select the “Move to trash” option to delete it.
6. Now, Click on the Apple icon. And select the “Restart” option.
7. After the restart is completed. Open your favorite browser—type discord in the browser search bar.
8. Visit the official discord site. Now, download the macOS version after the download is completed. Open the download folder.
9. Drag the discord.DMG file to the application folder. After it is successfully installed, open the app. It will open without a discord update failed on Mac.
If this tip helps you fix the “discord update failed Mac” issue or get further problems, please mention it in the comment section.
How To Fix Discord Update Failed Loop On Windows
Step 1: Stop Discord Running in the Background
So, the main thing that you need to do is really go and exit Discord. You can do that by clicking on the discord “X” icon. And afterward, obviously opening up the task manager. To guarantee that no different instances of discord are really running out of background.
1st, Close the Discord app.
2nd, right-click on the Taskbar. Then, a contextual menu will open.
3rd, Select the option called “Task Manager” from the menu. A task manager window will open.
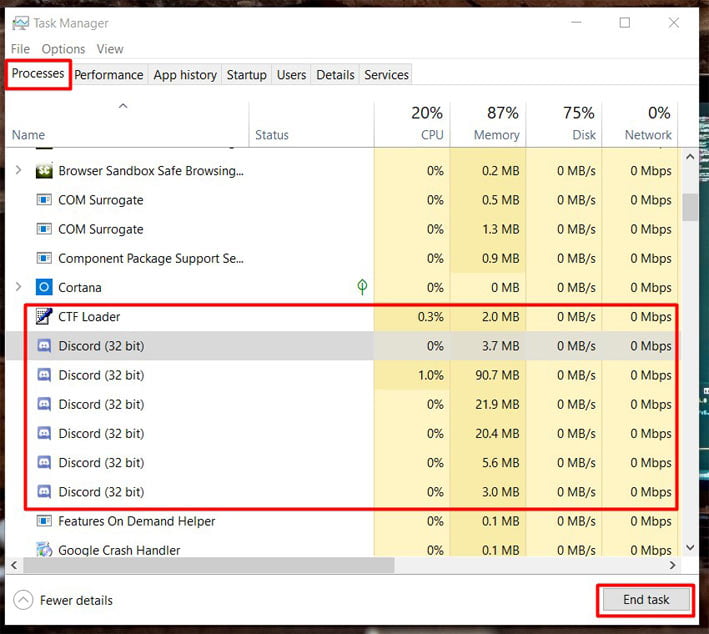
Discord can be somewhat naughty, as you see in the image.
4th, Go to the “Processes tab.” Look down, and you can see it’s actually running in the background.
So, in order for this fix to work. We need to end any running of discord instances that we actually find in our task manager’s processes tab.
5th, Select one instance and select the option “End Task” to close it. And, continue with this step to close each and every discord instance app successfully.
Whenever you’ve done that. You are free to go on to the next step.
Step 2: Turn off Windows 10 Antivirus For Now
So, above all else, what is Windows Defender? Windows Defender is a free program that accompanies Windows 10. What’s more, it’s intended to be a valuable tool that prevents harmful viruses and malware from coming to your PC.
So, we should perceive how we can disable Windows Defender temporarily. There are two different ways of turning off Windows Defender on your Windows 10 operating system. The first, which I will show you, is the temporary way.
So, let’s see this temporary way first:
1st, Go to the left-bottom corner and right-click on this Window icon.

2nd, In this context menu, click on Settings, and it will open Window Settings. You will see this update and security (windows update recovery and backup).
3rd, just click on this option. On the next window. Here, you will see on the left-hand side Windows Security.
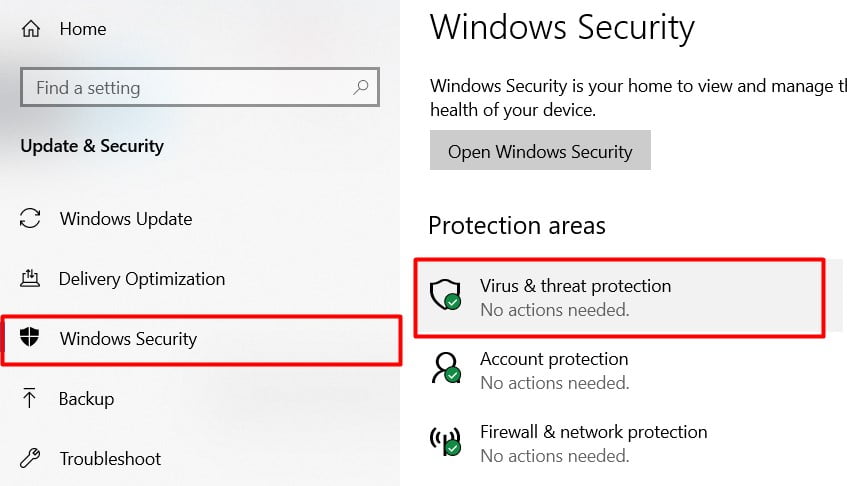
4th, Just click on the Windows security option. And it will open the security window. And here, you can see the first option is Virus and threat protection.
5th, Just click on this virus and threat protection option. And it will open another window.
6th, scroll a little bit down until you can see the Virus and threat protection settings.
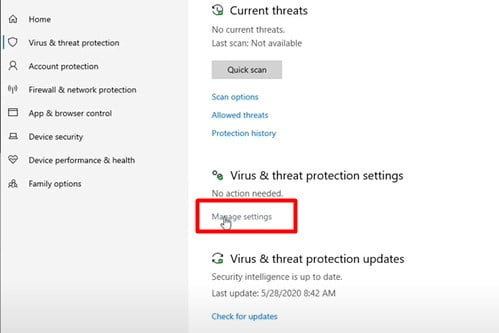
7th, And under this option. You can see the manage settings link. Just click on the manage settings link. and here you can see the real-time protection option.
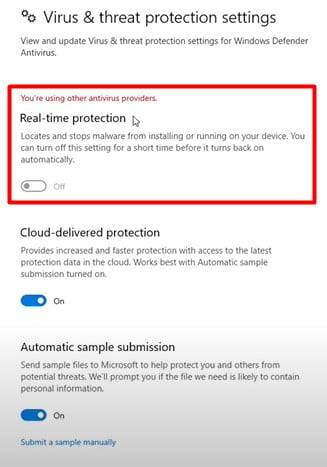
You may have turned it on by default. if you are utilizing the Windows Defender antivirus program. You need to turn it off for now. Just click on the switch button to make it turn off.
But if you are using other antivirus software. The first option will be disabled automatically.
Solution 1: Remove Update File From Appdata and Run the App
We need to open up the AppData folder. Explicitly, the local app data folder. to get at discord hidden settings and files.
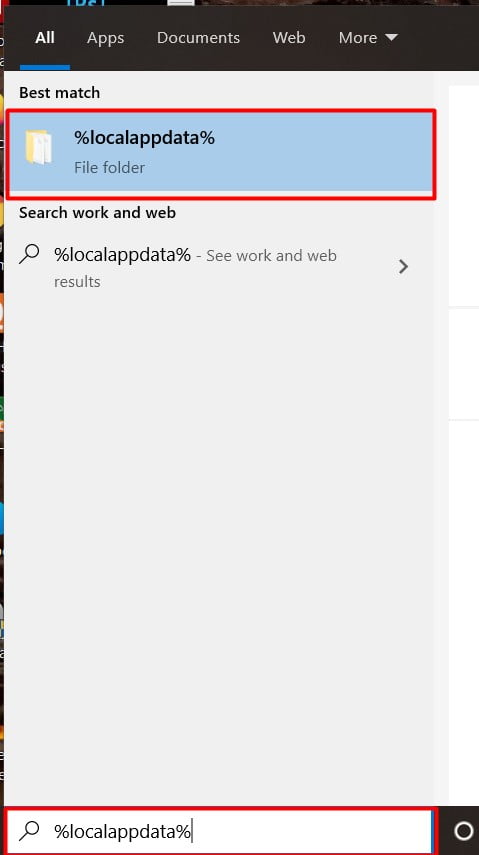
1st, In request to do that, we need to go down to the Windows 10 search bar. You can do this comparatively in Windows 8 and Windows 7. The search bar is just in another place.
You need to type in %localappdata% and press Enter. Furthermore, this will raise the local file which is in your app data folder.
OR
You can do this by pressing Windows Key + R. It will open the RUN dialog box. The type %localappdata% in the run input box.And Press Enter.
What is this? It’s all the hidden background files that software uses to do stuff. What they used to think and to store data.
Furthermore, this is the place where Discord keeps a ton of its stuff. So we’re simply going to look down until we find the discord file.
2nd, Open it up, and you need to find a file that is named something like update.exe. This file type is an application document.
This is the file that Discord is trying to download, and something turned out badly. It got corrupted, or something got exhausted .that why it’s experiencing difficulty reading and utilizing that file.
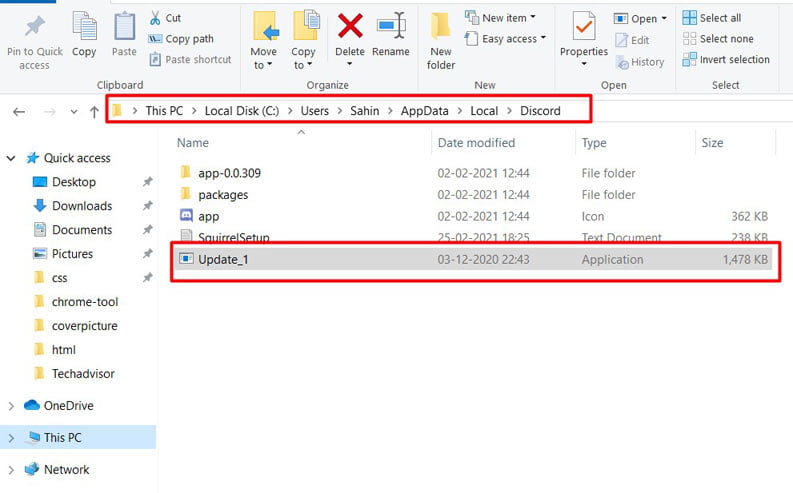
3rd, we’re simply going to right-click and rename it. Also, I renamed my file to underscore one. (Like this: Update_1). What’s more, I just clicked out of the way to complete and that is all I need to do now.
Discord thinks that that is a different file. Also, it’s the one searching for.
4th, Finally, kindly double tap on the discord application icon to open again. It will open normally as before.
Method 2,
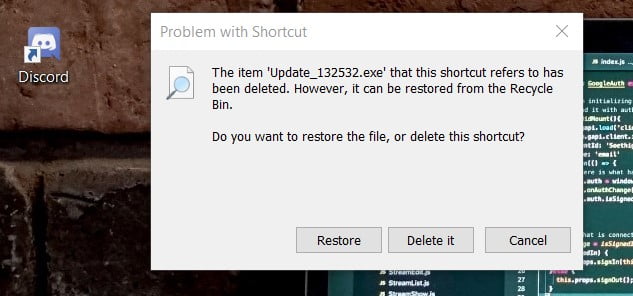
You can delete the update.exe file. And in order to open the discord app..it will open a pop-up box. Click on Restore. Now you probably see the “discord update failed loop” problem is gone. It should be open normally.
Presently, it will attempt to download the update file again, a brand-new variant of it. So that it can take a try to update again, and that is actually all you had got to do for most cases.
In case you are getting the discord update failed loop problem again. You are free to go with the next solution.
- Elden Ring: Savegame Manager Guide (Import, Download, Backup, Restore)
- Is LSFG’s Frame Gen Worth Buying for Any Game & GPU? Games Emulators (Old/New)
- What Role Does Automated Testing Play in Software Engineering?
- How to Lower Your Ping Using a VPN?
- How To Remove Activate Windows 11 Watermark Permanently?
- Crownfall Act 2: How to Unlock All Items, Arcanas- Complete Dota 2 Crash Course
- Data Protection and Privacy: Essential Cybersecurity Practices for Modern Marketers
- Benefits of Using a VPN While Gaming
Solution 2, Clean Uninstall & Reinstall
Instructions to do a clean uninstall of Discord voice chat on your Windows 10 PC. If you get the Discord Update failed error. It’s broken or buggy, or possibly you recently decided that you don’t care for it. Furthermore, you’d prefer to dispose of it. Also, set something else in its place. Also, deleting a discard is a beautifully simple process.
1st, Head on over to your Windows settings. Also, find your Apps window. This is the place where you store things like your current installed programming alongside your default applications.
2nd, and So on, then right down here in the D area is Discord. Feel free to click Uninstall. Also, this should eliminate the program from your PC.
Note: sometimes, when this is going, this may be broken. If your discord is still in difficulty. if that is the situation, don’t stress. The following stage will turn out fine. It simply implies that you definitely have a major issue with your Discord installation. And you have to do something to fix it.
So whenever it’s finished being uninstalled. Feel free to close this. Also, discover your way to the AppData folder.
1st, The most simple approach to arrive is to go down to your search bar in the lower left-hand corner, type in %localappdata%, and hit enter. When you hit enter, you ought to be in your Appdata > local folder.
2nd, Find the folder named Discord. This is the place where Discord gets introduced onto your PC, so if you see any files still within this folder. If the file is relevant to the discord. Feel free to right-click it and snap delete.
3rd, And next, head your way to your recycling bin. Finish the uninstallation process by right-clicking on it and selecting the Empty recycling bin option.
Everything has been uninstalled. You ought to be able to redownload Discord and Install it on your PC.
1st, Go to the Discord official Website.
2nd, Just click on download for Windows and save it to wherever you like.
3rd, Run the Installer. Everything should be reinstalled correctly.
Each and every one of your files ought to be up to date. If you had any broken stuff or buggy files or discord update failed loop issues. It ought to be gone. And afterward, you’re allowed to go around and scrutinize discord at your relaxation. Discord has another problem.it is discord no route error.
Stop Discord Automatically Starting
Turn off the open Discord app from the start. You can turn off the discord application on startup from the app itself. To do this:
1st, Please open the Discord app and then click on the option User Settings. An icon that looks like a gear right beside your discord profile avatar at the lower left.
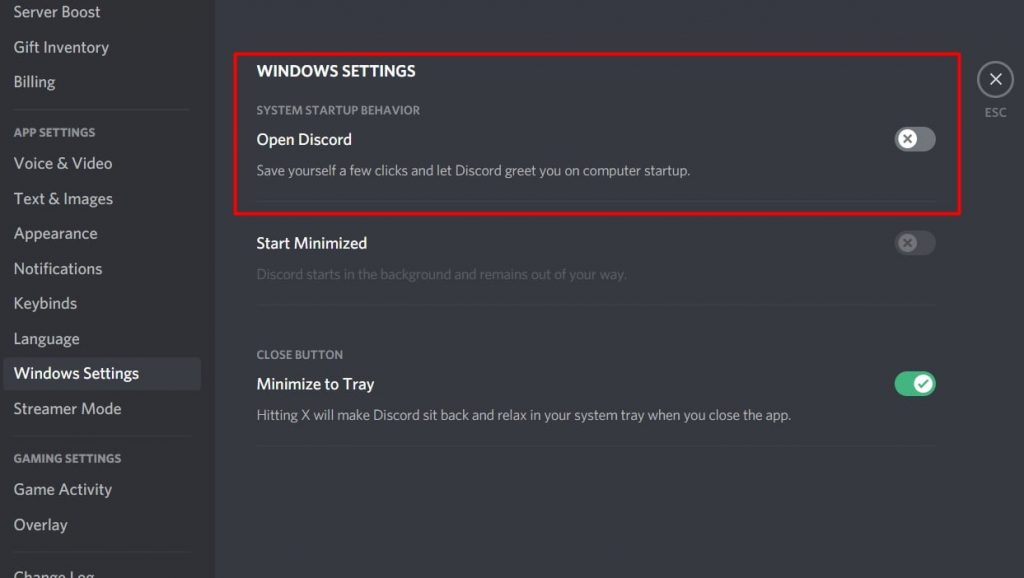
2nd, Next, at the left panel. Look for the Windows settings tab option. And click on it.
3rd, Next at the windows section of your discord. You will see the option “system startup behavior.” Then click on the toggle button to turn off the option. Click on exit to exit Windows settings.
4th, Restart your PC to apply the changes made and check if Discord no longer shows up on the startup.
Method 2,
The speediest method to stop open discord from starting when your Windows 10 PC boots up is from the task manager.
1st, Need to right-click on the start icon. This is located on the lower left side of the desktop.
2nd, Click on Task Manager. This opens the task manager window. Click on more details . This will expand the options available.
3rd, Click on the startup tab. This is the fourth tab from the left.
4th, Right-click on Discord, then click on disable. This prevents the app from starting during startup.
Conclusion
Many thanks to you for reading these tips to fix the “discord update failed loop problem.” I believe that you appreciated it and learned a ton. If this helped. Try to share this post. Do you think that I missed whatever ought to have been on this list? Tell me in the comment section down below.