Let’s solve Escape from castle claymount tree puzzle. If you are playing the escape game Escape From Castle Claymount on Cool Math Games, you might be stuck on the arcade tree puzzle in the hallway. This puzzle requires you to light up all the branches of a tree by pressing the right buttons on a panel.
How to Solve escape from castle claymount tree puzzle?
Preparation:
- Gather your wits: This puzzle requires careful observation and deduction. Take a deep breath, focus, and be ready to think outside the box.
- Inventory check: Make sure you have collected all the essential items you’ve encountered throughout the castle. You might need something unexpected!
Puzzle Breakdown:
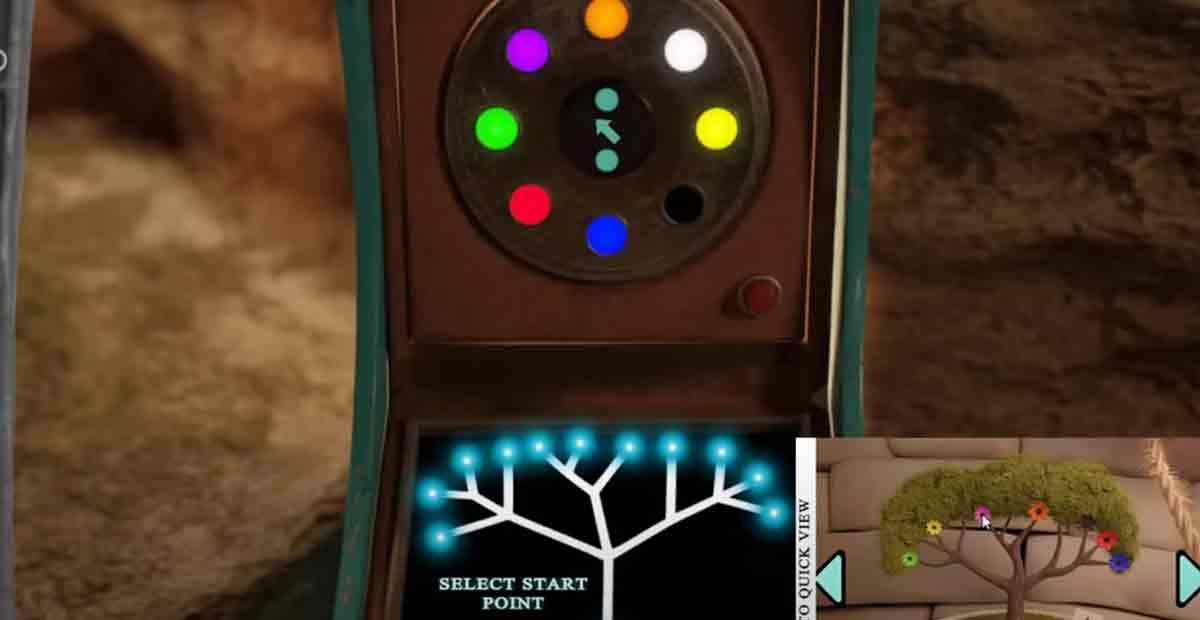
- Observe the tree: Take a good look at the Arcade Tree. Notice the different colored buttons adorning its branches, the symbols etched on the trunk, and any clues scattered around the room.
- Decipher the symbols: The trunk symbols likely hold the puzzle’s key. Pay close attention to their patterns, sequences, or connections to the colored buttons.
- Button logic: Experiment with pressing the buttons. Observe how they light up, activate platforms, or trigger other mechanisms. Look for cause-and-effect relationships between the buttons and their actions.
- Path planning: Chart a path through the branches using your observations and deductions. Remember, some buttons might activate platforms that disappear after a set time, so plan your moves strategically.
- Trial and error: Don’t be afraid to make mistakes! This puzzle thrives on experimentation. Analyze your failed attempts and adjust your approach accordingly.
Tips & Tricks:
- Color coordination: Look for color-coded clues in the room that might correspond to the button colors. Paintings, tapestries, or even stained glass windows could hold valuable hints.
- Think multidimensionally: The solution might not always be a linear path. Consider if buttons need to be pressed simultaneously or in a specific order to unlock certain sections.
- Seek hidden hints: The castle itself might hold clues. Examine bookshelves, tapestries, or even seemingly insignificant objects for hidden messages or symbols.
- Don’t forget the inventory: Some items you’ve collected throughout the castle might play a crucial role in activating buttons or reaching specific platforms. Use your brainpower and resourcefulness!
Remember:
- Patience and persistence are key. This puzzle is designed to challenge you, but with careful observation and logical deduction, you’ll crack the code.
- Enjoy the process! The satisfaction of solving this intricate puzzle is a reward in itself.
- If you get truly stuck, don’t hesitate to seek help online or consult walkthrough guides. But remember, the true thrill lies in conquering the challenge yourself!
Here is a step-by-step guide on how to solve this Escape from Castle Claymount tree puzzle and move on to the next room.
Step 1: Find the clues
Before you start pressing the buttons, you need to find some clues that will help you figure out the correct sequence. There are two clues hidden in the hallway that you need to find.
- The first clue is on the wall next to the arcade machine. There is a poster with a picture of a tree and some numbers on it. The numbers are 2, 4, 6, 8, 10, 12. This clue tells you the order of the buttons you need to press, from left to right.
- The second clue is on the floor next to the door. There is a rug with a pattern of circles and squares. The circles are red and the squares are blue. This clue tells you the color of the buttons you need to press, according to the position of the circles and squares on the rug.
Now that you have the clues, you can start pressing the buttons on the panel. The panel has 12 buttons arranged in three rows of four. Each button has a number and a color on it.
You need to press the buttons in the order and color the clues indicate.
- The first button you need to press is the second button from the left on the top row. This button is red and has the number 2 on it. Press this button, and you will see the top branch of the tree light up.
- The second button you need to press is the fourth button from the left on the middle row. This button is blue and has the number 4 on it. Press this button, and you will see the second branch of the tree light up.
- The third button you need to press is the sixth button from the left on the bottom row. This button is red and has the number 6 on it. Press this button, and you will see the third branch of the tree light up.
- The fourth button you need to press is the eighth button from the left on the top row. This button is blue and has the number 8 on it. Press this button, and you will see the fourth branch of the tree light up.
- The fifth button you need to press is the tenth button from the left on the middle row. This button is red and has the number 10 on it. Press this button, and you will see the fifth branch of the tree light up.
- The sixth and final button you need to press is the twelfth button from the left on the bottom row. This button is blue and has the number 12 on it. Press this button, and you will see the sixth and last branch of the tree light up.
Escape From Castle Claymont Wardrobe Code
Step 3: Enjoy the reward
Congratulations, you have solved the arcade game Escape from Castle Claymount tree puzzle! You will hear a sound and see a message on the arcade machine that says, “You win!”.
You will also see a key appear on the screen. Click on the key, and it will go to your inventory. You can use this key to unlock the door and enter the next room. Good luck with the rest of the game!