
How to Use Windows 10 Start Menu 👉: The “Windows Start menu” is probably going to be three of the most utilized zones of the “Windows 10 interface” for many people. There have been a few increases and upgrades to these devices in the ongoing Anniversary update, making them much simpler and progressively natural to utilize,
So We should investigate How to use Windows 10 start menu.
Before going to the Guide How to Use Windows 10 Start Menu, First, we should know the over of Start Menu.
1. Apps List
As you use Windows 10 and the different applications and software, a rundown of your most-utilized apparatuses will show up here. This is continually refreshed as your utilization of the OS ævolves.
At the highest point of the All Apps list is a Recently Added segment, demonstrating recently introduced software, and a Most Used part indicating your preferred applications, Click either name to open a bounce to the letter menu.
2. System Folders
You can change the file & folders that show up in the base portion of the Start menu, contingent on how you use Windows 10. Settings, Power, and All Apps will consistently be available in this piece Of the menu yet everything else can be picked in Settings Personalisation.
3. Search Bar
The search bar is constantly noticeable on one side of the Windows Left-button except if seeing an application or game in full-screen mode. Snap in the Ask Me Anything box and the search window will open.
You can either type your search term or, whenever set up, utilize the “Mic” to ask Cortana. At the point when the inquiry menu opens, it will ideally be prefilled with pertinent links and information.
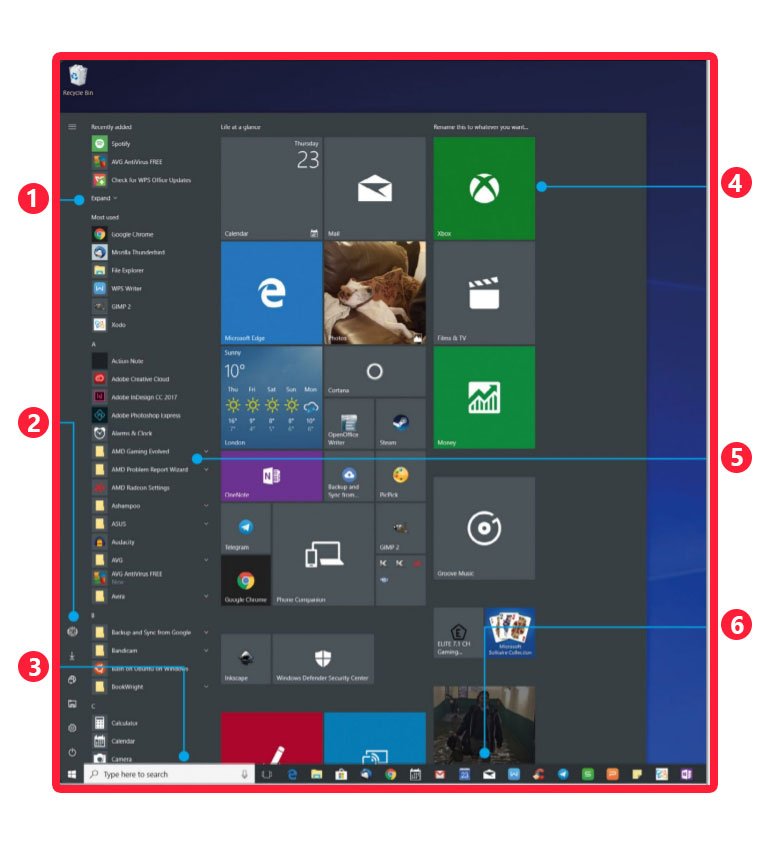
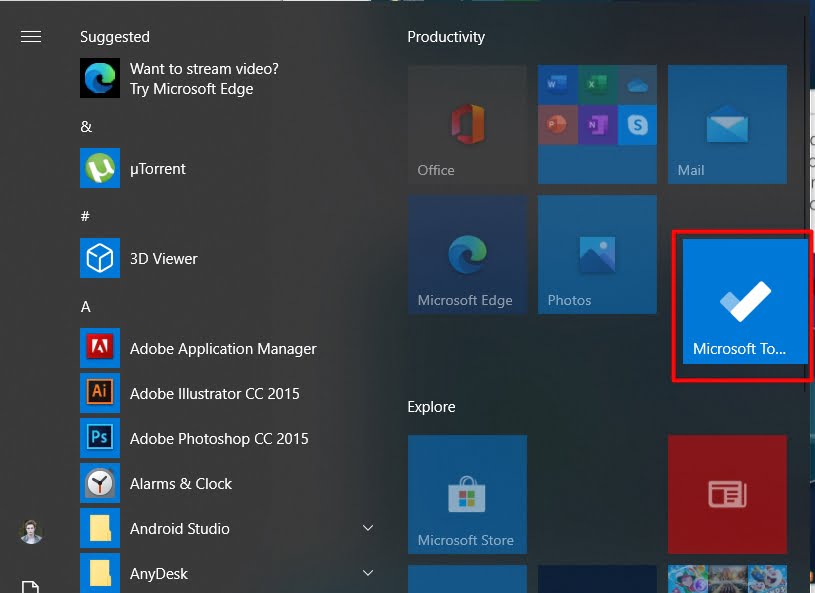
4. Tiles Style Start Menu
Similarly likewise with “Windows 8.1”, the tiles that show up in the Start menu show data (when proper) from the applications and services they connect to, You can alter the vibe of the tiles by right-tapping on them and choosing an alternative from the menu that shows up. Tiles are currently consequently part of important segments, for example, Play and Explore.
5. Folders On Start Menu
On the off chance that you pin applications to the Start menu. their symbols will show up beneath the square of tiles, You would now be able to move these application symbols into envelopes inside the Start menu.
To do this, snap and drag one symbol on another. On the off chance that the base symbol grows marginally as opposed to moving Out Of the way, drop the symbol to make the folder.
6. Taskbar (left)
The taskbar contains shortcut routes to a considerable lot Of the utilized applications, including the Edge App Store and File Explorer. You can add any application to the taskbar by right-tapping on the tile or application symbol and choosing Pin to taskbar from the menu. Right-tapping on the taskbar will likewise permit you to add distinctive toolbars to it.
7. Action Center
Notifications in the Action Center range from security cautions and system mistakes to messages and Facebook refreshes. On the off chance that you are seeing notices here that you needn’t bother with, Twitter refreshes, for instance, you can right-tap the taking and mood killer notifications for that application.
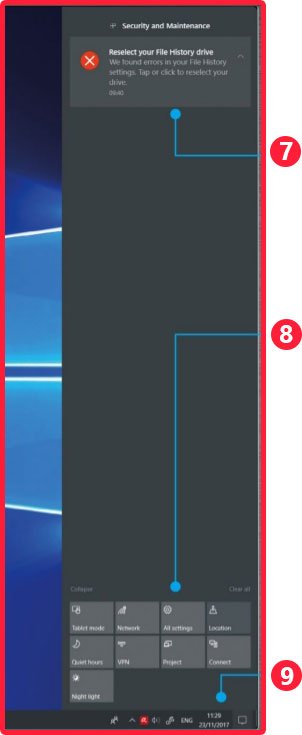
8. Quick Settings
The Quick Settings shown here will differ depending upon the gadget you are utilizing. You will ordinarily observe WI-FI, Note, All Settings, Bluetooth, Location, and Quiet Hours here in any event. In the event that the Quick Settings menu is crumpled, click the Expand catch to show the full menu. You would now be able to tweak the brisk settings catches that appeared in “Settings -> System > Notifications and Actions”.
9. Taskbar (right)
The right-hand side Of the taskbar contains a few fundamental Windows apparatuses. Here you can check battery power (if utilizing a PC). your Wi-Fi association details, speaker volume, and a few different things.
You will likewise discover the catch to open the new Action Center here The Anniversary update included warning identifications here, so you can see new notice sums initially. In the next section, we will explain How to Use Windows 10 Start Menu step by step.
Personalization
You can customize the Start menu and taskbar in various manners. Open the primary settings and Tap-on “Personalisation”.
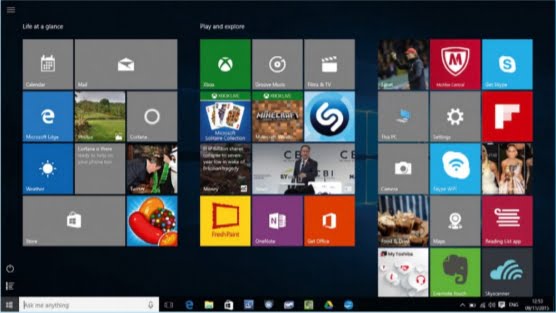
In the Start segment, you will see sliders to control whether you see as of late included applications, most utilized applications, and so forth. You can likewise set the Start menu to show in full screen as it did in Windows 8.1. if you want to use a simple start menu go for it Traditional Start Menu.
Main Part of How to Use Windows 10 Start Menu
The Start menu in Windows 10 is about significantly more than simply showing a rundown of your applications and software. It incorporates Live Tiles, easy routes to folders, and settings, and you would now be able to try and make envelopes inside the menu itself.
So whether you simply need to utilize it as a straightforward rundown or in the event that you need to make it the center point of your PC, the Windows 10 Start menu has it secured.
Get to Clutches with Start
Microsoft has totally overhauled the Start menu for another period and it appears to get improved with each update to the OS, so it takes a bit of becoming accustomed to it from the outset. Here’s our voyage through the new Start.
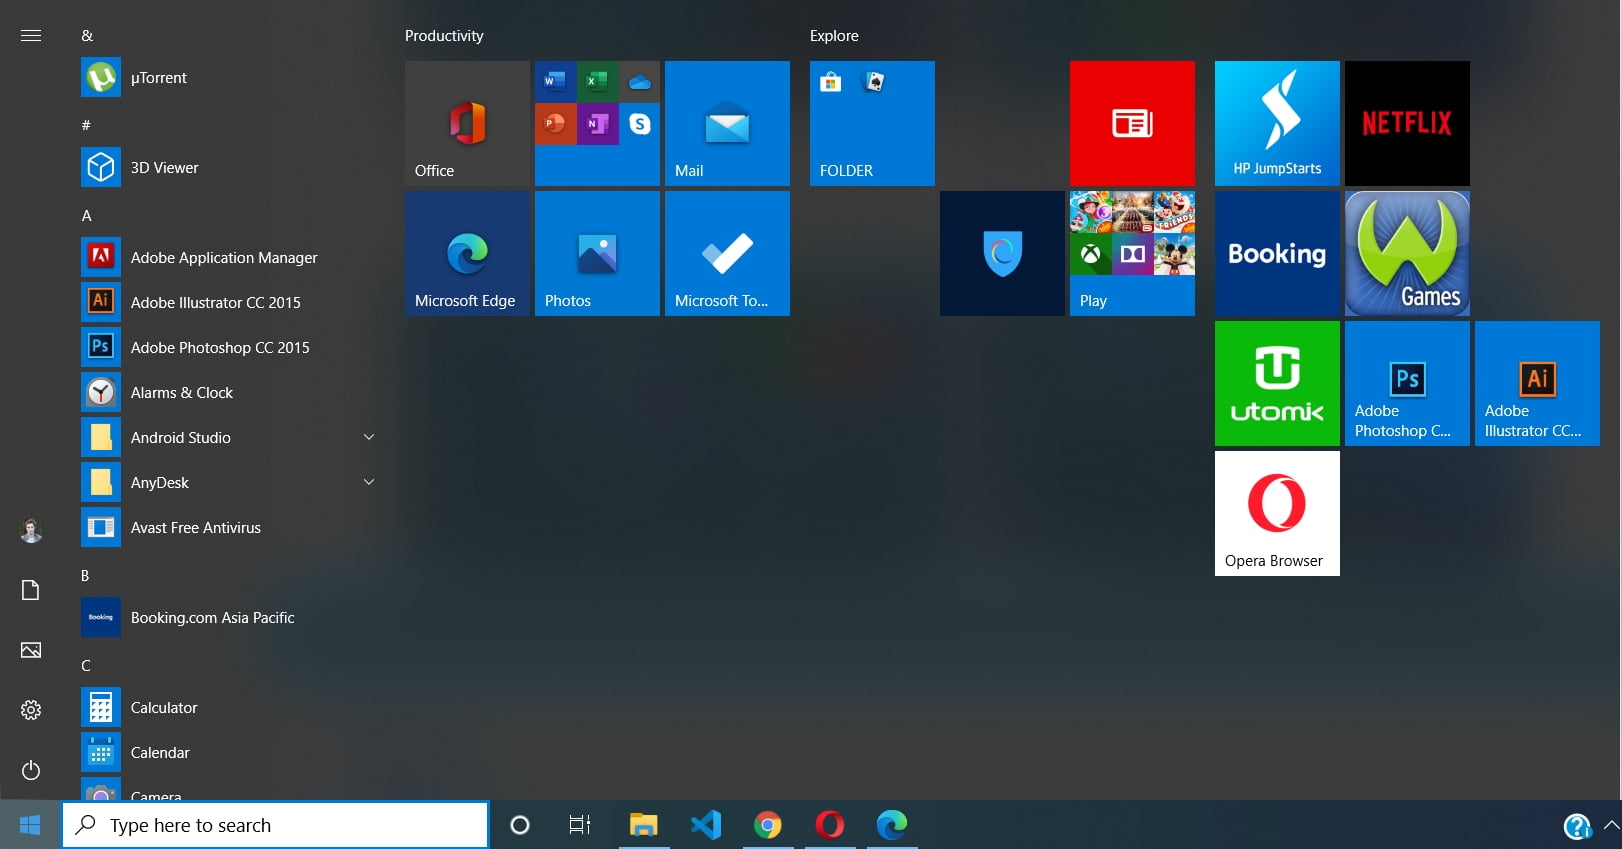
1. You open the Start menu by tapping the Windows symbol in the base left of the work area or by squeezing the Windows key on your keyboard. The menu in Windows 10 is a blend of the Windows 7 and 8 styles however works better than either, with a rundown of applications on the left and Live Tiles on the right.
2. The live tiles work similarly as they did in Windows 8. You can drag any of them around the menu should you wish to reorder them. You can right-click any document, folder, or application in Windows 10 and select Pin to Start to incorporate it here. Once in the menu, snap and drag to rearrange tiles.
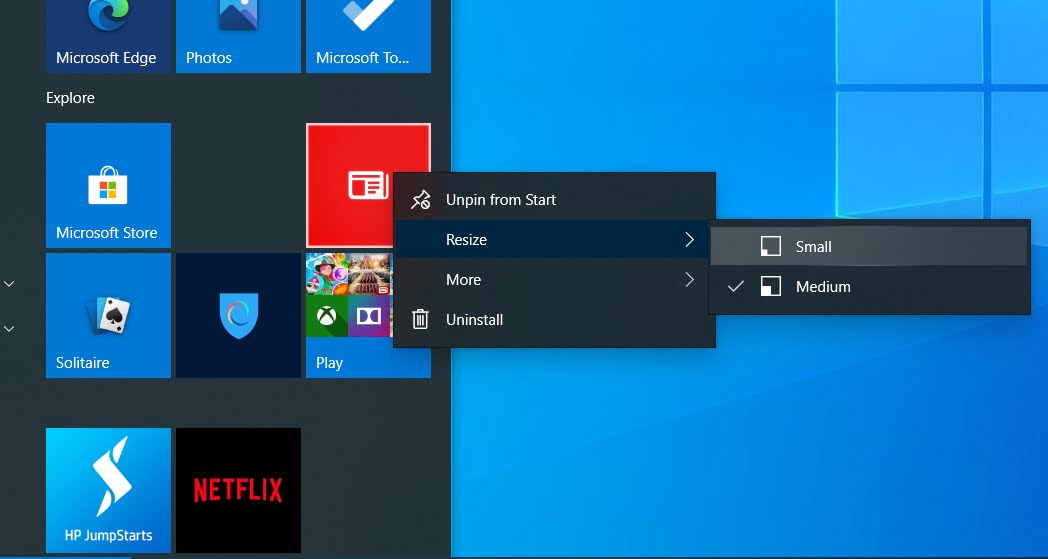
3. You can right-click anything in the live tiles territory of the WIndow 10 Start menu to raise the tile menu. This allows you to unpin, resize, and even transform the live tile into a static tile. There are up to four distinct sizes of live tile: little, medium, and wide giving you heaps of approaches to assemble the ideal Start menu.
Also Read: How To Set Up Dual Boot Windows 10 System ✅
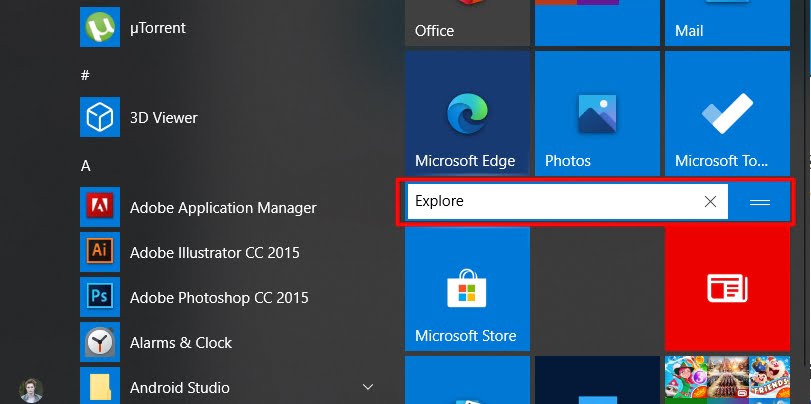
4. The tiles are part of groups. You can tap the headings on existing groups to rename them. Dragging one of the tiles to the base of the menu, to an unused zone of the menu, empowers you to make another gathering. A bar will show up at the base to demonstrate that another gathering will be made.
Also Read: How To Make Windows 10 Look Like Windows 7 ✅
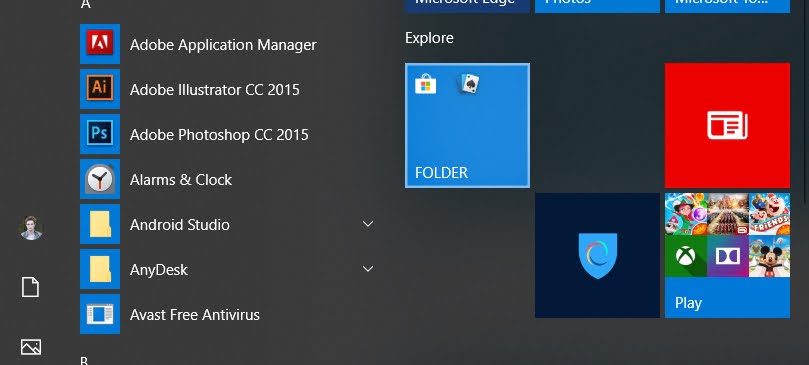
5. The Start menu presently takes for the creation of folders. This implies you can additionally sort out the menu by keeping related application symbols in a single spot. To make a folder, basically, hold and drag an application symbol over another. The symbol underneath will extend somewhat. Drop the hauled symbol and the folder is made.
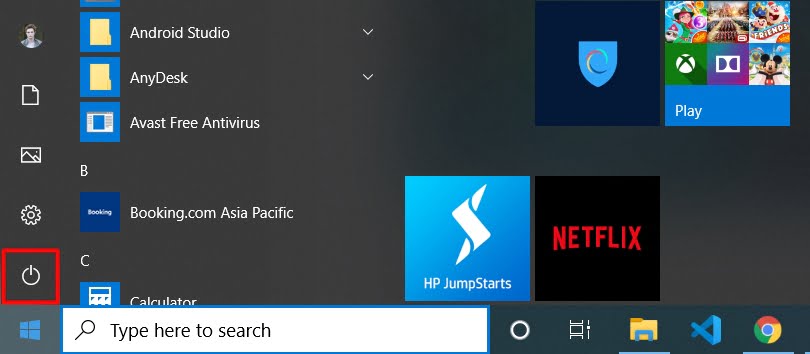
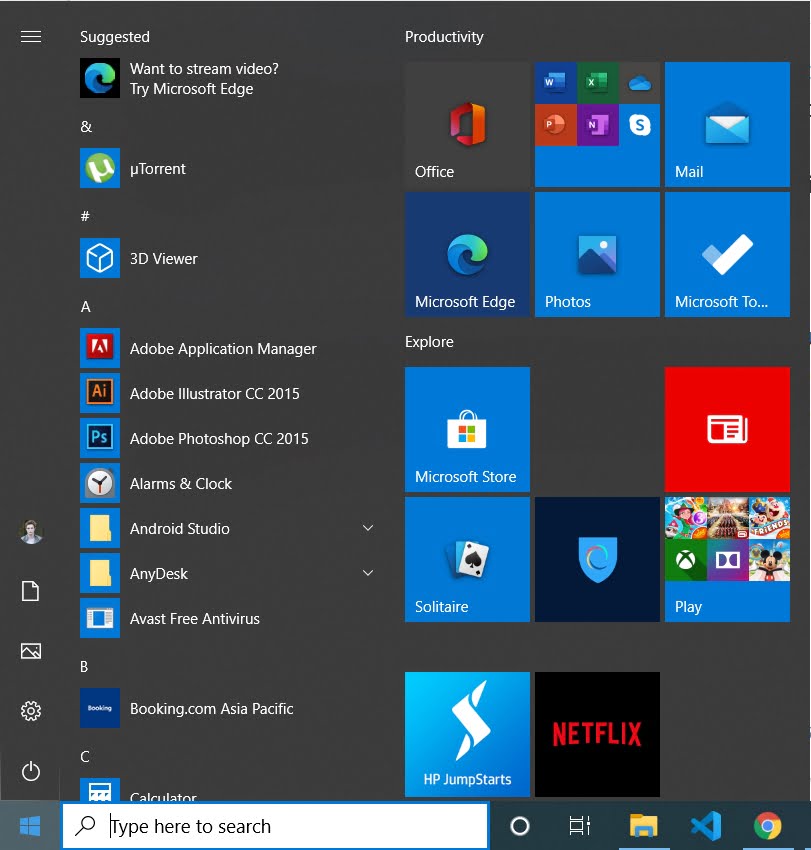
6. On the left-hand side at the base, there’s a rundown of key things, for example, the Settings application and an alternate route to the File Explorer. Snap the force symbol and you can close down or restart your PC. You can add more choices to this easy route segment in Settings > Personalisation > Start > Choose which folders show up.
Also Read: How To Use Action Center In Windows 10 ✔️

7. The last section of the Windows 10 Start menu is the applications and software list. This shows the entirety of the introduced applications and software on your PC (software that doesn’t expect the establishment to run won’t appear here). Look here and there to see the full rundown and snap the arrow close to applications to see more alternatives.
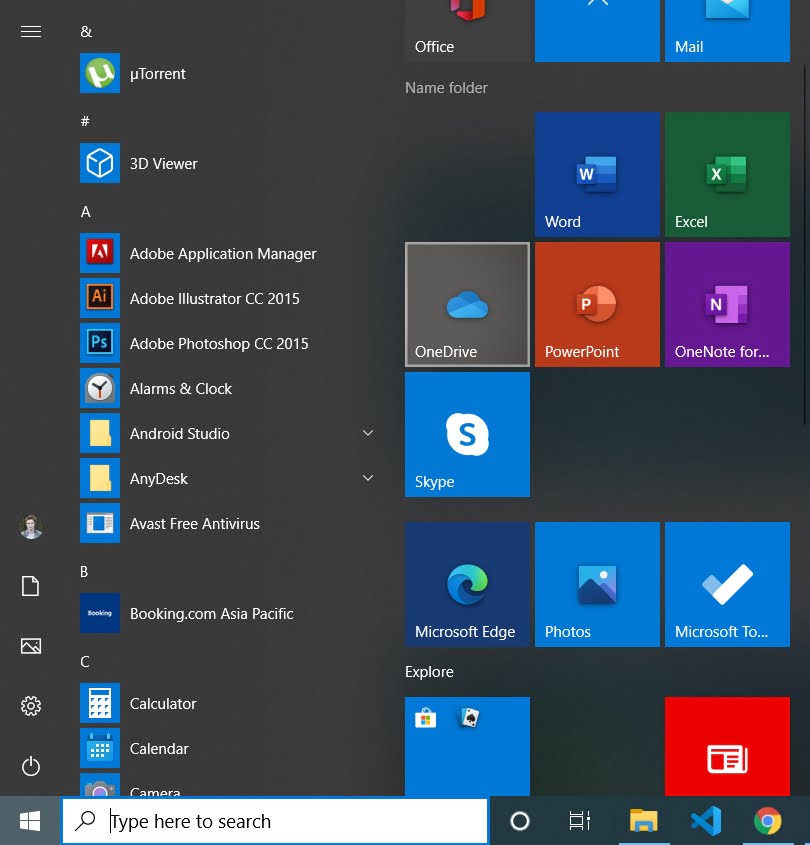
8. The Most utilized area at the highest priority on the list enables you to get to as of late opened programs. This will likewise show as-of-late opened documents, so in the event that you have Microsoft Word installed, essentially go to the menu next to the symbol in the most utilized applications menu and you can right away open your as-of-late worked-upon records.
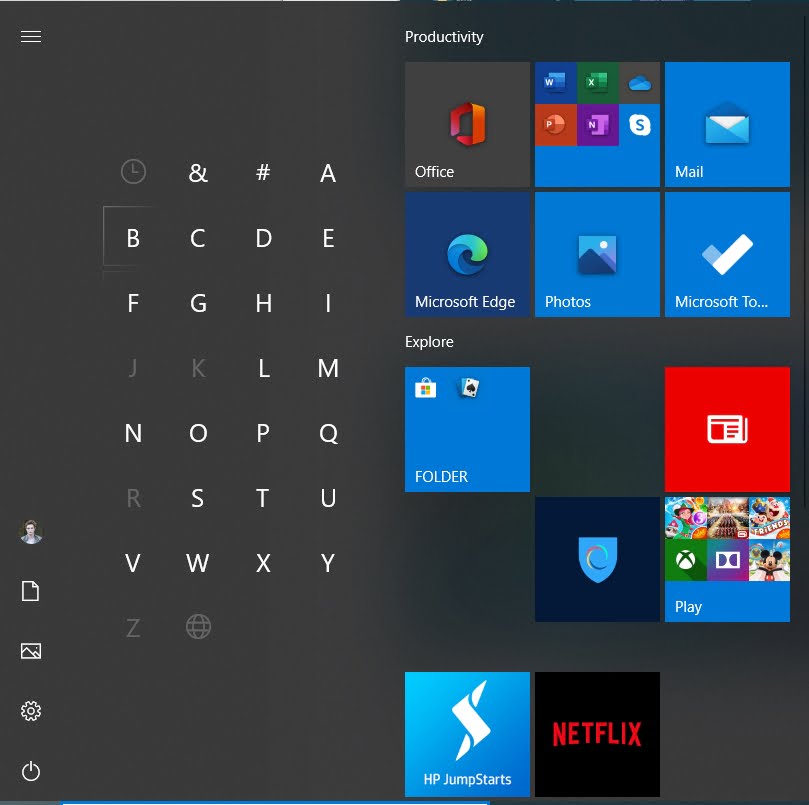
9. Tapping on any of the headings (counting the individual letters) of the applications rundown will open an A-Z choice menu. You can then rapidly tap on any of the letters to jump legitimately to the recorded applications that start with that letter, as opposed to looking down through the whole thing.
10. Finally, Windows 10 additionally makes it simple to resize the Start menu. Move the mouse to the edges and resize handles will show up, so you can make them spread a large portion of your screen or a lot little extent. You can even set the Start menu to open the full screen, by going to Settings > Personalisation > Start.
Let us know How helpful this post is about How to Use Windows 10 Start Menu.