
Distant Horizons and Shaders are a dream team for Minecraft players who crave epic landscapes and stunning visuals. Here’s how to install and use them to transform your world:
Minecraft is already a pretty cool game, but with the right mods and shaders, you can take the graphics to a whole new level! Here’s a simple guide to get you started with Distant Horizon and some awesome shaders.
Insane In-Game Minecraft Graphics
Ready to make your Minecraft world look insanely good? With Distant Horizon and shaders, you’ll see your game in a whole new light, literally!
How to Install & Use Distant Horizon + Shaders In Minecraft
Let’s get those mods installed in Minecraft so you can start enjoying some epic graphics.
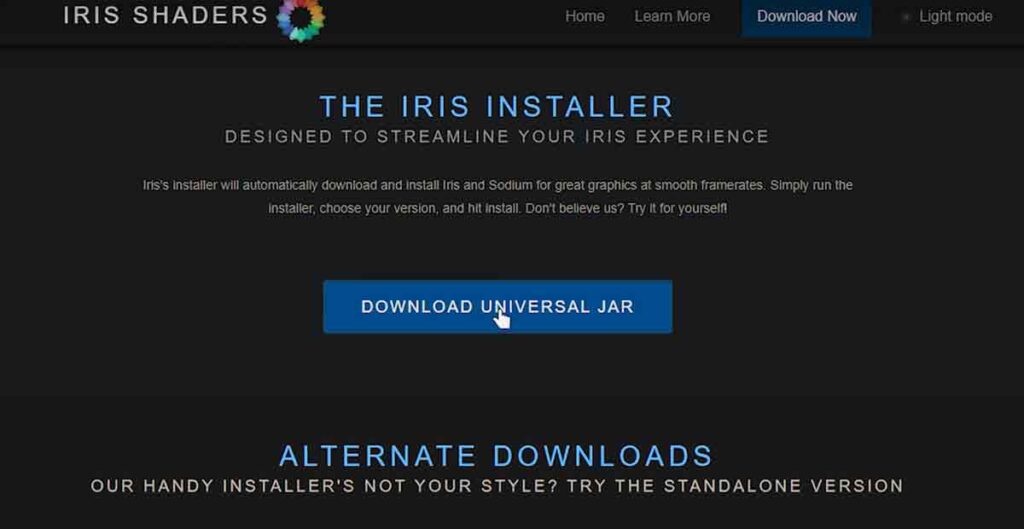
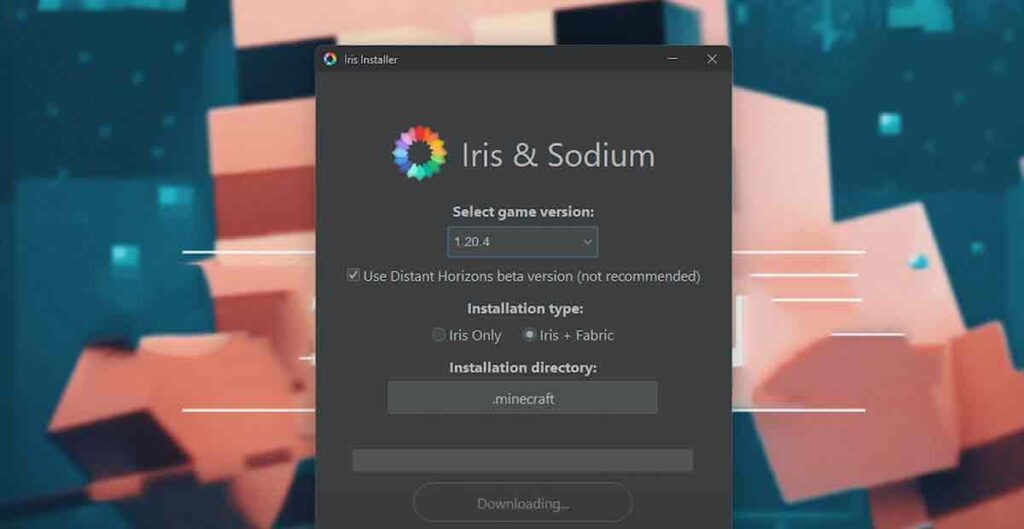
How to Install Iris in Minecraft?
- Grab the Installer: Go to the Iris Shaders website and download the installer file.
- Run the Installer: Double-click the file you just downloaded. It should open with Java. If it doesn’t, you might need to install Java first.
- Follow the Steps: The installer will pop up and guide you through the process. Just make sure you select the right version of Minecraft you’re playing.
- Launch Minecraft: Open up the Minecraft Launcher. You should see a new profile named ‘Iris’ there. Select it and hit ‘Play’.
- Shader Packs Folder: In the game, go to ‘Options,’ then ‘Video Settings,’ and finally ‘Shaders.’ There’s a button there to open the shader packs folder.
- Drop the Shaders In: Download a shader pack from the web and drop it into the folder you just opened.
- Activate the Shaders: Back in the game, select the shader you added from the list, and enjoy the new looks!
How to Install Distant Horizons in Minecraft?
- Download the Mod: Head over to a mod site like CurseForge and find Distant Horizons. Hit that download button.
- Install Fabric: Distant Horizons needs another mod called Fabric to work. So, download and install that first.
- Put the Mod in the Folder: Once Fabric is installed, drop the Distant Horizons file into your ‘mods’ folder inside the ‘.minecraft’ directory.
- Tweak the Settings: When you start Minecraft, you’ll have new settings for Distant Horizons. Adjust them to fit your computer’s power.
- Enjoy the View: Load up a world and marvel at how far you can see. It’s like Minecraft got glasses!
And that’s it! You’re all set to play Minecraft with some seriously upgraded graphics.
How to Optimize Minecraft with more RAM?
Boosting your Minecraft game with more RAM is like giving it a power-up! Here’s how to do it, step by step:
- Check Your RAM: Before you start, you gotta know how much RAM your computer has. You can find this out by opening the Task Manager on Windows or the About This Mac section if you’re on a Mac.
- Open Minecraft Launcher: Fire up the Minecraft Launcher where you usually hit ‘Play.’
- Go to Installations: There’s a tab named ‘Installations’ at the top. Click it!
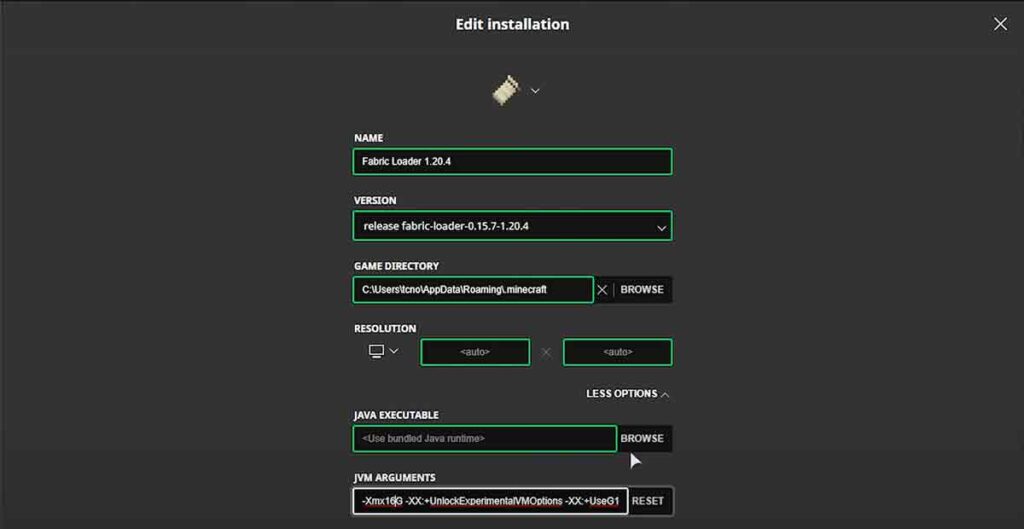
- Edit Your Installation: Find the version of Minecraft you want to boost and click the three dots on the right. Then hit ‘Edit’.
- More Options: Scroll down a bit, and you’ll see ‘More Options’. Click that.
- JVM Arguments: Look for a box with a bunch of text starting with ‘-Xmx1G’ or ‘-Xmx2G’. That ‘G’ stands for gigabytes of RAM.
- Change the Number: Replace the ‘1G’ or ‘2G’ with the amount of RAM you want to use. For example, ‘4G’ if you want to give Minecraft 4 gigabytes.
- Save: Hit ‘Save’ and you’re all set.
Just remember, don’t go overboard. Only use half of your computer’s RAM for Minecraft to keep everything running smoothly. And that’s it! You’ve just given Minecraft a turbo boost!
How to Optimize Minecraft with more RAM?
Boosting Minecraft:
- Start Minecraft Launcher – Just open it up.
- Pick ‘Fabric Loader 1.120.4’ – If you’ve got Fabric, it’s in the menu. If not, you’ll see something else.
- Go to ‘Installations’ – Find your Fabric version.
- Hit Edit – Click the three dots and choose ‘Edit.’
- More Options: Scroll down a bit and you’ll see ‘More Options’. Click that.
- JVM Arguments: Look for a box with a bunch of text starting with ‘-Xmx1G’ or ‘-Xmx2G’. That ‘G’ stands for gigabytes of RAM.
- Change the Number: Replace the ‘1G’ or ‘2G’ with the amount of RAM you want to use. For example, ‘4G’ if you want to give Minecraft 4 gigabytes.
- More Options – Check this section out.
- RAM Stuff – Minecraft usually uses 2GB. Let’s crank it up.
- Task Manager – Press Ctrl + Shift + Escape.
- Check Memory – Look under ‘Performance’ to see your RAM.
- Check Your System’s RAM: Open Task Manager (Ctrl + Shift + Escape), go to the “Performance” tab, and look for “Memory” to see how much RAM your computer has.
- Allocate More RAM to Minecraft: For better performance, assign about 70% of your leftover RAM to Minecraft. If you have 6GB, give Minecraft 4GB.
- Save and Launch: Save your changes in the launcher settings, and then start Minecraft.
- Change It in Launcher – Adjust the RAM setting.
- Save and Play – Hit save and start the game.
What mods were installed?
Mods in Minecraft are like wonderful add-ons that spice up the game. Here’s a quick rundown of some cool ones:
- OptiFine: It’s the all-in-one tool for better Minecraft graphics. Makes everything look strong and run smoothly.
- WorldEdit: It’s like magic for builders. Create massive structures in a snap!
- Just Enough Items (JEI): Can’t remember how to craft something? JEI’s got your back with all the recipes.
- Botania: For those who love nature. Adds magical plants and fun stuff to your garden.
- Create: It’s all about creating machines that do the work for you. Build your automated world!
- Ice and Fire: Brings dragons to Minecraft! Tame them or take them on – it’s an adventure.
- Mowzie’s Mobs: Meet new creatures, each with their own cool tricks. It’s like a wild adventure park.
Mix these mods to customize your Minecraft experience just how you like it. It’s your world, your rules!
Distant Horizon settings
Setting up Distant Horizon in Minecraft is like tuning a car for the best performance. Here’s how to get it just right:
Tweaking ‘Distant Horizons’:
- Find it in Options – When you’re playing, hit up the options. Look for ‘Distant Horizons’ and switch it off to see what changes.
Adjusting ‘Quality Preset’:
- Match Your Graphics Card – If your graphics card isn’t top-notch, lower the setting to save on VRAM.
- Go ‘Aggressive’ for Speed – If you want everything to pop up fast, choose ‘Aggressive.’ It’ll make your CPU work harder, but things will load quicker.
Setting It Up:
- Choose Your Mode – I go all out with ‘Aggressive’ to make the world appear super fast.
- Start Creative Mode – After tweaking, kick off a single-player game in creative.
- Watch the Magic – You’ll get a heads-up about ‘Distant Horizons’ doing its thing. Peek at Task Manager, and you’ll see your CPU giving its all.
- Adjust Render Distance: This is how far you can see in the game. Distant Horizon lets you crank this up without making your computer sweat. But don’t max it out; find a sweet spot where the game looks good but still runs smooth.
- Fog Density: This makes distant stuff look misty. It’s not just for looks; it can actually help your game run better. Try setting it around five for a nice balance of looks and performance.
- LOD (Level of Detail): Distant Horizon uses LOD to make far-away things simpler, so your computer doesn’t have to work as hard. It’s like seeing things in less detail when they’re far off, which is totally fine because you’re not up close.
- Multithreading: If your computer has a bunch of cores in its CPU, Distant Horizon can use them to do more work at once. It’s like having a team of workers instead of just one. But if it’s making your computer slow, you might want to dial it back.
- LOD Chunks: These are the chunks of the game world that Distant Horizon simplifies. You can set how often they update. Less frequent updates mean better performance, but the world might not change as quickly when you move around.
- Compatibility: Make sure Distant Horizon plays nice with your other mods. Some mods work better together than others. It’s like making sure all the parts in your car are working together properly.
Remember, every computer is different, so what works for one person might not work for another.
FPS Showdown: Vanilla vs. Distant Horizons
- Plain Minecraft – Just the basic game, no extras. Runs smooth and keeps a good frame rate ’cause it’s easy on your computer.
- Add Distant Horizons – This is where it gets cool. This mod lets you see way farther without slowing down your game. It’s like a brainy trick to keep the frames rolling smoothly.
- LOD Magic – Stands for ‘Level of Detail.’ Far-off stuff looks simpler, so your computer chills a bit more. Your frame rate stays up.
- What’s the Score? – Folks tested it. With Distant Horizons, you can spot things from miles away (okay, 64 chunks) and still have solid frames. It’s a tad lower than plain Minecraft, but hey, you get to see a whole lot more.
- The Lowdown – Plain Minecraft = smooth sailing on frames. Distant Horizons = tiny frame drop, but you get mega views. And it’s smart enough to not let your frame rate crash.
Why Should You Use Shader in Minecraft?
Minecraft just got a cool update that lets you use shaders in the Bedrock Edition without any extra mods. Shaders make the game look super pretty with better lighting, shadows, and textures. Here’s the lowdown:
- Shaders Are In: Mojang, who make Minecraft, added shaders directly to the game. Now, everyone can make their Minecraft world look more realistic and vibrant.
- Render Dragon: That’s the name of the new graphics engine they’re using. It works on mobile, PC, and Xbox, so lots of players can enjoy the new look.
- Easy to Turn On: Just go to the video settings in Minecraft and enable the ‘Deferred Technical Preview.’ This turns on the new shaders.
- Cool Effects: With shaders on, you’ll see awesome effects like better shadows, bloom (a glowy look), and tone mapping (which makes colors look great).
So, Minecraft’s graphics just got a major upgrade, making everything look even more amazing. And the best part? You don’t need to be a tech whiz to get it all set up.
How To Install Shaders In Minecraft?
- Grab OptiFine – It’s the key to shaders. Snag it from their site.
- Install OptiFine – Open the file with Java and hit ‘Install.’ Easy.
- Shader Hunt – Find some cool shader packs on the web. Stick to legit sites to keep your PC happy.
- Drop ‘Em in Minecraft – Fire up Minecraft, hit ‘Options,’ then ‘Video Settings,’ and tap ‘Shaders.’ There’s a spot for your shaders.
- Turn On Shaders – Pick a shader from the list, click ‘Done,’ and boom—new look!
And you’re all set! Your Minecraft is now looking snazzy with shaders.
That’s it! With Distant Horizons and Shader packs, Minecraft becomes a visual masterpiece. Enjoy exploring the blocky world in all its glory!